Sports show at Augusta Expoland, Fishersville, VA. Gun show at Rockingham County Fairgrounds, Harrisonburg, VA.
Coming attractions are the Friends of NRA dinner in MacGaheysville, VA April 17th and the NRA Annual Meeting in Charlotte, NC on 13-16 May.
Starting to get back "in the groove".
Went to the Harrisonburg show and met Clint Bryant. Enabled him on a 24 which he got after I'd left. I did get 2 cans of Greek .30-06 M2. I understand the Greek .30-06 is good. I know their .303 Brit is!... and... 2 boxes of Thin Mints.... I couldn't help it. The girl was with her dad (and his 2 cans of ammo) and she took $7 of my money.
There were some interesting guns including a Ruger 1A in .35 Whelen which was asking about $900. That was the cheapest #1 at the table. I saw a couple of PAL M1 bayonets. The one with the scabbard was asking $150 (I'm beginning to see a pattern here). Many 1905 bayonets, some mis-identified. Only on topic because these would work with the Garand...
I was surprised at the dearth of other M1 stuff. One, that's 1, guy had some clips. Even the milsurp guys (were there 3 or 4 Clint?) didn't have any M1 stuff. There was some M14/M1A stuff. There were several Garands, VERY ratty and asking outrageous (I think) prices. H&Rs and Springfields (late guns) asking $800+.
Pursuit of obsessive reloading, shooting, hunting, and other outdoor sports and related activities with the internationally known Hobie. These are my own experiences and opinions and only I am to blame for the content. Reloading data is used at your own risk. I am not responsible for anyone else's use of any such data or information.
Pages
▼
Sunday, February 28, 2010
Saturday, February 27, 2010
Patron Saint of Handgunners
The St. Gabriel Possenti Society promotes the public recognition of St. Gabriel Possenti, including his Vatican designation as Patron Saint of Handgunners.
St. Gabriel Possenti was a Catholic seminarian whose marksmanship and proficiency with handguns single-handedly saved the village of Isola, Italy from a band of 20 terrorists in 1860.
The Possenti Society offers a variety of materials related to St. Gabriel Possenti and a biblical understanding of self-defense.
The Savior of Isola
In 1860, a band of soldiers from the army of Garibaldi entered the mountain village of Isola, Italy. They began to burn and pillage the town, terrorizing its inhabitants.
Possenti, with his seminary rector's permission, walked into the center of town, unarmed, to face the terrorists. One of the soldiers was dragging off a young woman he intended to rape when he saw Possenti and made a snickering remark about such a young monk being all alone.
Possenti quickly grabbed the soldier's revolver from his belt and ordered the marauder to release the woman. The startled soldier complied, as Possenti grabbed the revolver of another soldier who came by. Hearing the commotion, the rest of the soldiers came running in Possenti's direction, determined to overcome the rebellious monk.
At that moment a small lizard ran across the road between Possenti and the soldiers. When the lizard briefly paused, Possenti took careful aim and struck the lizard with one shot. Turning his two handguns on the approaching soldiers, Possenti commanded them to drop their weapons. Having seen his handiwork with a pistol, the soldiers complied. Possenti ordered them to put out the fires they had set, and upon finishing, marched the whole lot out of town, ordering them never to return. The grateful townspeople escorted Possenti in triumphant procession back to the seminary, thereafter referring to him as "the Savior of Isola".
Jay Winters
Thursday, February 25, 2010
Saturday, February 20, 2010
Guns and Ammo Videos
Guns and Ammo TV has a lot of video up on the internet. Neat stuff to wile away an afternoon.
Tuesday, February 16, 2010
Notes from the gun shop...
I love working in the gun shop.
First, I got some clips for the Garand. Then I got to listen to all the stories. One is kinda sad. Seems the builder some 40 years ago used concrete nails to frame out around the house chimney through which the woodstove flue went. This winter has been extra cold (hear that Al) and they've been burning the woodstove hot for quite a while. The flue heated the nails which gradually raised the 2x4s framing around the chimney to ignition temperature. Result, minus one house. Positive results? Proof that a fire-proof safe is good, cheap insurance. $60K worth of firearms were unharmed but for a bit of smoke damage. Apparently the smoke got in via the dehumidifier cord hole.
Second, I got to see some neat guns. The best was a near perfect Colt M1903 Military .32 ACP. Beautiful but without accouterments or box. Did I say beautiful? It would make you swoon... The other was a M74 Winchester in .22 Short with the neatest aperture sight mounted on the rear of the receiver AND threaded for a Maxim silencer.
Saturday, February 13, 2010
Rifle, M-1 Garand, Caliber .30-06

Designed by John Cantius Garand (1888–1974), the M1 was an en-bloc clip fed, gas-operated, air-cooled, semiautomatic rifle chambered for the .30-06 cartridge. It was adopted by the U.S. Army on January 9, 1936. After a redesign to correct a major problem, the Marine Corps began employing the M1 in November of 1940. 4,000,000+ M1 rifles were constructed between 1942 and 1945 by Winchester Repeating Arms and Springfield Armory.
The M1 saw extensive service in World War II and the Korean War, and was officially removed from service in 1957 (replaced by the M14), although it was employed by Allied nations in the Vietnam War. I saw rifles in active service with the Republic of Korea Army as late as 1979 but have read that they were used by reservists until very recently. Approximately 100,000 of those ROK rifles will be re-imported soon.
I've been wanting one of these rifles for a while but always managed to convince myself not to buy one. The weight, chambering, use, and price always seemed to work against it. However, it is an iconic rifle, one that is a must have for either the shooter of the .30-06 cartridge (for which I have much brass), the militaria collector, or somebody who enjoys "classic" rifles. I guess that now includes me. So, for the past couple of years I've been working my way to sufficient funds for the purchase of a Civilian Marksmanship Program Garand.
However, as it seems often happens, when I actually got to the site to get the forms to order the rifle the CMP had managed to lay out some rather tempting bait for me guaranteed to take more of my money than I planned.
The CMP Special is virtually a new Garand with CMP cartouche. It is beautiful and it has nothing of the commemorative, "gold" "inlaid" trash one sees about it but is a purely military gun. I had to have it. So, just about the middle of January I finally got all the paperwork together and sent it off. I expected to have to wait until the first of May but then got word it would only take about 60 days or the first of April and then, suddenly it seemed, notice that it shipped on the 9th of February! That was exciting but then an intense relationship with the FEDEX tracking page ensued. I was somewhat disappointed when it wasn't delivered as forecast but the rifle has now arrived and we will now begin accumulating the necessary accouterments.
This particular rifle was rebuilt by CMP on a receiver first manufactured as a rifle in July 1943. One can only wonder at the history this particular receiver has seen.
Aside from ammunition, one has needs and "needs" with this rifle. One definitely needs the en-bloc chargers aka "clips". Without them the rifle is nonfunctional. The clips are available in single round, 2-round, 5-round and standard 8-round types (a partial list of manufacturers below).
En-bloc clip/charger manufacturers
| Maker | Code |
| Aggressive Engineering Corp | ACE |
| Aggressive Engineering Corp | AGE (1&2) |
| All Metal Products | AMP |
| Austrian | 5mm hole |
| Barry L Miller Eng Inc | BLM |
| Borg Warner | B-W |
| Borg Warner | BR-W (1-7) |
| Danly Machine Co | Danly (side of clip) |
| Dominion Arsenal Quebec | DAQ |
| Fedders Mfg | fE |
| Fedders Mfg | fF |
| Haerens Ammunitions Arsenal | HA |
| International Silver | IS (1-5) |
| Israel Military Industries | IMI |
| Italian or Danish | L&H 81 |
| Italian | LP (1955,1956&1961) |
| Julius Maurer | JMO (68-74) |
| Lerio Patent Cup Co. | C |
| Nationalist China | 58 |
| Nationalist China | C* |
| Northwest Metal | NW |
| Manfacture D"Armes St Etienne | MAS |
| Metaalwaren Fabrik Tiburg | MFD |
| Murik & Ball Zeist | MBZ |
| Northwest Metal | NW |
| Serini France | S.F. |
| Stanley Works | S |
| Stanley Works | SW |
| Springfield Armory | SA (large or small or with dashes) |
| Thomas French & Co | TF&S |
| R Wallace & Sons | W (4 or 5) |
| Wade Electric Products | WEP |
| Winchester Repeating Arms | WRA |
| Winchester Repeating Arms | WRA Eductional |
I'm going to have to sort it out with this list...
- Blank stamp Springfield Armory
- AMP Stamp All Metal Products Co. (hard to read)
- ACE 2 Stamp Aggressive Engineering Corporation (Military production)
- AEC 2 Stamp Aggressive Engineering Corporation (Commercial production)
- AEC 3 - Aggressive Engineering Corp (Commercial)
Anaheim, CA
- AGE 1 - Aggressive Engineering Corp (Millitary contract)
Anaheim, CA - AGE 2 - Aggressive Engineering Corp (Millitary contract)
Anaheim, CA - AMP 1 - All Metal Products Wyandotte, MI
- BLM - Barry L Miller Eng Inc Irvine, CA
- BRW 1 Stamp Borg-Warner Spring Division
- BRW 2 Stamp Borg-Warner Spring Division
- BRW 3 Stamp Borg-Warner Spring Division
- BRW 4 Stamp Borg-Warner Spring Division
- BRW 5 Stamp Borg-Warner Spring Division
- BRW 6 Stamp Borg-Warner Spring Division
- BRW 7 Stamp Borg-Warner Spring Division
- B-W 4 - Borg Warner (WW2) Spring Division,Bellwood, IL
- C - Lerio Patent Cup Co. Mobile, AL
- DAQ Stamp Dominion Arsenal (Quebec)
- fF - Fedders Mfg Buffalo, NY
- HA - Haerens Ammunitions Arsenal Copenhagen, Denmark
- IMI Stamp Israeli Military Industries (Israel)
- I S 1 Stamp International Silver Company
- I S 2 Stamp International Silver Company
- I S 3 Stamp International Silver Company
- IS 4 - International Silver Meriden, CT
- IS 5 - International Silver Meriden, CT
- JMO Julios Maurer, Oberstein Germany
- 58 - Nationalist China
- 59 Nationalist China
- 68 JMO Stamp Julius Maurer (Germany)
- 69 JMO Stamp Julius Maurer (Germany)
- 70 JMO Stamp Julius Maurer (Germany)
- 71 JMO Stamp Julius Maurer (Germany)
- 72 JMO Stamp Julius Maurer (Germany)
- 74 JMO - Julius Maurer Oberstein, Germany
- LP 1956 Stamp Italian (name unknown)
- L&H 81 Italian or Danish
- LP 1961 Stamp Italian (name unknown)
- NW Stamp Northwest Metal Products
- MAS Manufacture D' Armes St. Etienne France
- MBZ Stamp (fat letters) Mourek & Ball, Zeist (Netherlands)
- MBZ Stamp (small letters) Mourek & Ball, Zeist (Netherlands)
- MBZ Stamp (regular letters) Mourek & Ball, Zeist (Netherlands)
- MFT Mataal Fabriek Tilburg Netherlands
- NW - Northwest Metal Seattle, WA
- SF Serini France
- S - Stanley Works (or SW) New Britain, CT
- S A Stamp Springfield Armory
- S A Stamp with dash underneath Springfield Armory
- S A Stamp (oversized letters) Springfield Armory
- TF&S Thomas French & Co. Ltd
- W4 - R Wallace & Sons Wallingford, CT
- W5 Stamp R. Wallace and Sons
- W6 - R Wallace & Sons Wallingford, CT
- WEP Stamp Wade Electric Products
- WEP1 - Wade Electric Products Sturgis, MI
- WRA - Winchester Repeating Arms New Haven, CT
- WR Wallace & Sons Mfg.
- 5 Stamp Unknown - might be an S for Stanley Works but uncertain at this point
- 5mm hole. - Austrian
- Sling: The rifle was issued with a cotton canvas such as was first issued in 1943. This sling is very similar to the green nylon slings issued with the M16 rifles prior to adaptation/issue of the black "silent" sling. This sling would be correct for the Korean War period.
- Carry Case: I want a period case but I also want quality. I've not yet decided how to go with this.
- Bayonet: The correct bayonets, i.e. those used during the life of the rifle include the M1905, M1942, M1, M1905E1, and M5. I have a Springfield Armory 1905 made in 1906 (bright finish sans scabbard) but it won't go on the rifle. Not sure exactly why it doesn't work as the ring fits and latch works. Nothing seems out of spec, but... I really want an M1 or M1905E1.
Loading for the Garand is an exercise in balance. One needs to ensure that there is enough but not too much pressure at the gas port. Original M2 Ball ammo moved a 150 gr. flat-based spire-point bullet at 2700 fps. The long-time ideal powder has been IMR4895. With that in mind I've been looking for a load I could "mass" produce for my rifle. Here follow some of those suggested loads. Bullets are seated to a cartridge overall length of 3.34"
| Bullet | Weight | Powder | Weight | Velocity | Energy |
| Sierra MatchKing | 150 gr. | IMR4895 | 47.0 gr. | 2650 fps | ______ |
| Sierra MatchKing | 150 gr. | IMR4895 | 48.5 gr. | 2700 fps | ______ |
| Sierra Int. HPBT | 168 gr. | IMR4895 | 47.5 gr. | 2670 fps | ______ |
Links:
- Ace Case for Garand Rifles
- Appleseed Project
- Assembling an M1 Garand Rifle from Parts
- Civilian Marksmanship Program
- Clip Manufacturers (with photos!)
- Guns & Ammo Video on the Garand
- Fulton Armory
- Garanditis
- Garand Collectors Association
- Shuff's Parkerizing and Military Arms Restoration including the Mini-G
- The .30-06 Military Cartridge
Thursday, February 11, 2010
Texas Longhorn Arms
An friend of mine is writing a book on Bill Grover and Texas Longhorn arms. Along with much traveling, collecting, interviewing, photography, etc, he has, with Boge Quinn of Gunblast.com, created a web site devoted to the book. If you haven't been interested in these guns or their maker you might well become so. It is a fascinating story.
Handirifle twist rates...
I just though I'd archive this where I could find it, I hope, as we needed the info at the shop. This is also interesting because it lists the cartridges for which the Handi Rifles have been chambered.
Twist rates of Handi Rifles:
Twist rates of Handi Rifles:
| Chambering | Twist Rate |
| .17 HMR | 1 in 9" |
| .22 LR | 1 in 16" |
| .22 WMRF | 1 in 16" |
| .204 Ruger | 1 in 12" |
| .22 Hornet | 1 in 12" |
| .223 Remington | 1 in 12", late models are a mix of 1 in 9"/1 in 12", 2007 Marlin produced barrels are 1 in 9" |
| .22-250 | 1 in 14" |
| .25/06 | 1 in 10" |
| .243 Winchester | 1 in 10" |
| .270 Winchester | 1 in 10" |
| .280 Remington | 1 in 10" |
| .308 Winchester | 1 in 10" |
| .357 Magnum | 1 in 18¾" |
| .357 Maximum | 1 in 18¾" |
| .35 Whelen | 1 in 16" |
| 7mm-08 | 1 in 10" |
| 7.62x39 COMBLOC | 1 in 9¾" |
| 7x57 Mauser | 1 in 10" |
| 7x64 | 1 in 10" |
| 7mm Rem Mag | 1 in 9½" |
| .30/30 | 1 in 10" |
| .30/06 | 1 in 10" |
| .300 Win Mag | 1 in 10" |
| .38/55 Winchester | 1 in 18" |
| .44 Magnum | 1 in 38" |
| .444 Marlin | 1 in 38" (original) |
| .444 Marlin | 1 in 20" (2007 models) |
| .45/70 Government | 1 in 20" |
| .450 Marlin | 1 in 20" |
| .45 Colt Carbine | 1 in 16" |
| .45 Colt/410 | 1 in 16" |
| .500 S&W | 1 in 18¾" |
| 20 ga. | 1 in 28" |
| 12 ga. | 1 in 35" |
Monday, February 08, 2010
Raid on Schenectady
320 years ago today my ninth great-grandmother was killed (shot and burned) by French and Indians at Schenectady, New York. Her daughter, my eighth great-grandmother, survived the attack. Also killed was my tenth great-grandfather and one of my eighth great-granduncles whose brains were dashed out against the wall. I thought that I might take the time to remember Engeltie Barentse Blom Vrooman, Hendrick Meese Vrooman, and Heindrick Vrooman by including this account of the raid. At the conclusion you will find a list of those killed and carried away to Canada.
The fate of Schenectady was sealed in the middle of January, 1690, when 114 Frenchmen and 96 Sault and Algonquin Indians, most of who had been converted by the Jesuits, started from Montreal to attack English outposts to the south. It was part of a master plan of Count Frontenac, governor to Canada, to fulfill the commission of French King Louis XIV to "build a new empire in America."
They came down across the frozen reaches of the St. Lawrence and finally, in about six days, down to a point at what is now Fort Edward, where the French officers held council on the plan of attack. It was here that they began to compromise with the Indian leaders on the feasibility of attacking Schenectady instead of the original objective, Fort Orange (Albany).
Another journey of about 17 days down to the Mohawk Valley brought the war party scarcely two miles from the fur-trading post beside the Binnekill on February 8. It was about four o'clock in the afternoon and a blizzard came howling down from the north-west, icy winds swirling snow about the would-be attackers as they huddled in a final council near what is now Alplaus.
The French leaders, Lieutenants Le Moyne de Sainte Helene and Daillebout de Mantet, ordered Indian scouts to cross the Mohawk and see what precautions the Dutchmen had made against the enemy attack. The French were well aware that attack warnings had been posted in the valley communities and they did not know how well the Schenectady stockade might be garrisoned.
The Dutchman's fireside on that night of Feb. 8, 1690, glowed with the radiance of humble content. Within the raftered room, its floor and ceiling reflecting Holland cleanliness, he warmed himself before the crackling logs. He was smugly certain that his house was safe from attack - on a night such as this, even the foolhardy Frenchmen would not be expected from the frozen north regions.
The scouting party sent to spy on the objective returned to the Alplaus encampment about 11 p.m. and reported to the French commanders that no one was guarding the stockade; even the north gate facing the river had been left open. This information and the extreme cold, prompted the decision to attack at once rather than wait until 2 a.m. as originally planned.
The half-frozen invaders crossed the river on the windswept ice and soon were inside the stockade, forming a cordon around the houses that now were quiet with sleep. Suddenly, the high-pitched war cries of the warriors split the silence, the signal for a bloody massacre that was to last fully two hours.
Houses were quickly put to the torch and inhabitants who came stumbling out in their nightclothes were shot or tomahawked and their scalps taken by the shrieking Indians. Neither woman nor children were spared, and soon their bodies lay along the snow-covered streets, Illuminated now by the fitful glow of the burning dwellings.
Adam Vrooman (my 9th great-grandfather), whose house stood on the west corner of Front and Church Streets, fought so desperately that his life and property were spared by the French. It was a tragic stand by the valiant Dutchman, however. His wife and child were killed and his son Barent and a Negro servant were carried away as captives.
About 60 persons were killed outright, including 10 women and 12 children. Some managed to escape from the burning stockade area to seek shelter with families some miles distant. It is said that many of these died of exposure in the bitter cold before they got far.
The ride of Simon Schermerhorn to warn Albany of the French invasion often is sited as a testimony to the stamina of the Dutch settlers. When the massacre started, Simon mounted a horse and managed to escape by the north gate. Though wounded, he made his way through the snow-drifted Niskayuna Road until he reached Albany about 5 o'clock the next morning. Later, a party of Albany militia and Mohawk warriors pursued the northern invaders and killed or captured 15 or more within sight of Montreal.
A grim scene greeted the first streaks of dawn as the French rounded up their prisoners and spare horses and supplies to begin the long trek back to Canada. The ruins of the burned homes were steaming mounds beside the blackened chimneys; victims still lay in blood-stained snow where they had been killed or dragged.
A party had been sent across the river early that Sunday morning to the Sanders mansion in Scotia. "Coudre Sander" (John A.) Glen was told that he would have the privilege of choosing his relatives from among the prisoners in return for having been kind to some French captives when they were in the hands of the Mohawks a few years earlier. Glen claimed as many "relatives" as he dared.
The French and Indians left early in the afternoon with 27 prisoners and 50 good horses.
The utter helplessness of the Schenectady inhabitants during the massacre - many offered no resistance since they had no time even to seize their weapons - was shown by the fact that only two of the enemy were killed and one severely wounded. However, aside from the fact that a long and difficult sortie into the English territory had been accomplished, it is doubtful that French authorities considered the mission a great success.
By capturing Albany, and perhaps destroying it, the French might have succeeded in detaching the Iroquois from the English besides holding the key to the navigation of the Hudson. But it was not done, and now the whole English province was stirred up like a hornet's nest over the carnage wrought at Schenectady.
The Dutch village which had begun its settlement in 1662 had suffered a setback so severe, that three decades later, there was some doubt it would be rejuvenated. The uncertainty of future safety of border inhabitants and the utter dejection which prevailed after the massacre raised serious doubts among the survivors as to the expediency of rebuilding the village and cultivating the soil.
The township had been depopulated since the massacre. Records of 1698, for example, listed 50 men, 41 women, and 133 children - or a total of 224 persons - living in the area from Niskayuna to the Woestyne.
So for the decade that followed the massacre and closed out the 17th century, Schenectady and its inhabitants presented an unhappy, but industrious, picture of a settlement determined to rise like a Phoenix out of the ashes.
The Schenectady Massacre:
Settlers Killed and Captured
This is a list of people who were killed and captured by the French and Canadian Indians who invaded Schenectady, NY on the 9th of February 1689/90 that was posted on the Dutch Colonies Mail List.
YE PEOPLE KILD AND DESTROYED BY YE FRENCH OF CANIDA AND
THERE INDIANS AT SKINNECHTADY TWENTY MILES TO YE
WESTWARD OF ALBANY BETWEEN SATURDAY AND SUNDAY YE
9TH DAY OF FEBRUARY 1689/1690
Aertse, Jorls shott and burnt 1
Alexander, Robt souldr of Capt. Bulls shott 1
Alolff, Mary wife of Cornelis Viele Junr Shott 1
Andries, Daniel & George 2 souldiers of Capt Bull 2
Bratt, Ands Arentse shott & Burnt & also his childn 2
Christoffelse, David & his wife with 4 Children all burnt in there house 6
Church, Serjt of Capt Bull's Compy 1
de Goyer, Jan Roeloffse burnt in ye house 1
Gerritse, Sander ye sonne of Hysbert Gerritse kild & burnt 1
Grant, Ralph a souldler in ye fort shott 1
Harmense, Frans kild 1
Hessellng, Robt shott 1
Jansse, Barent Killd & Burnd his sonne kild 2
Janz, Antje doughter of Jan Spoor kild & burnt 1
Marc ellis, Gerritt and his Wife & childe kiled 3
Pleterse, Wm kild 1
Potman, Joh: kild his wife kild & her scalp taken off 2
Schaets, Reynier and his sonne kild 2
Skermerhoorn, Johannes ye sonne of Symon 1
3 negroes of Symon Skernerhoorn 3
Talmidge, Enos Leift of Capt Bull kild & burnt 1
Tassemaker, Dome Petrus ye Minister kild & burnt In his house 1
Teunise, Sweer shott & burnt his wife kild & burmt 2
4 negroes of ye said Sweer Teunise ye same death 4
Van Eps, Jan and his sonne & 2 of his chilkren kild 4
a negro of dito Van Eps 1
Viele, Mary wife of Dowe Aukes & her 2 children killd 3
and his negro Woman Francyn 1
Vroman, Engel the wife of Adam Vroman shot & burnt her child the brains dashed out against ye wall 2
Vroom an, Hind Meese & Bartholomeus kild & burnt 2
2 negroes of Hind Meese ye same death 2
Wemp, Myndert killd 1
a french girl Prisoner among ye Mohogs kild 1
a Maquase Indian kild 1
In all 60
LYST OF YE PERSONS WHICH YE FRENCH AND THERE INDIANS HAVE
TAKEN PRISONERS ATT SKINNECHTADY AND CARIED TO CANIDA
YE 9TH DAY OF FEBRUARY 1689/90
Baptist, Jan sonne of Jan Van Epps 1
Bouts, Stephen adopted sonne of Geertje Bouts 1
Burt, David belonging to Capt Bull's Compe 1
Gerritse, Stephen ye sonne of Gysbert Gerritse 1
Groot, Abraham, Claes, Dyrck, Phillip & Symon
all 5 sonnes of Symon Groot 5
Harmense, Claes sonne of Franse Harmense 1
Janse, Arnout sonne of Paulyn Janse 1
Marks, Joseph of ye Capt Bull's Compe 1
Purmurent, Lawrence sohne of Claes Lawrence Purmurent
Switts, Isaak Connellse & his eldest Sonne 2
Teller, Johannes and his negro 2
Vedder, Albert & Johannes sonnes of harme Vedder 2
V iele, Arnout ye sonne of Arnout Corn Viele ye Interpr 1
Vroman, Barent ye sonne of Adam Vroman & ye neger 2
Webb, John a souldier Belonging to Capt Bull 1
Wemp, John sonne of Myndt Wemp & 2 negroes 3
a negro of Barent Janse
In all 27
Sunday, February 07, 2010
Gun Handling, Hollywood Style
It might look like nothing more than juggling an irregularly shaped object but one has the added concern of safety, for the audience... The military drill teams do something similar but with service rifles. This takes lots of practice!
Saturday, February 06, 2010
Snow
We've had a bit of snow lately. Second 19"+ snow this winter. VERY unusual for the Shenandoah Valley. It puts Nana, a Florida native, on edge to drive on snow or to ride with me. Consequently she's been housebound for a bit and gone shack happy. I have managed to avoid that because I worked two days this week although not my usual Friday and Saturday due to the big snow. More snow is coming. I don't know how she's going to like that.
Another outlet for me has been clearing snow. I've got the Cub Cadet snow blower/thrower and it sure helped me move a lot of snow. Thank goodness. What little bit of shoveling I had to do I must not have done right. My back is a bit stiff tonight.
This photo is of my front walk (not front side-walk which is to what this one leads) after a pass with the snow blower/thrower. The big "hole" on this end is so that I don't have to wade through 23" of snow (my inseam is 29") to turn the machine. It cut that hole in one pass albeit with a stop now and then to let the impeller clear the chute.
The machine works really well with both augers going. They weren't both going earlier this week. I'm not sure exactly what happened but the left auger sheared the shear bolt. I replaced it with a proper diameter bolt from the shop. Might not be proper but the auger works now. I needed it to work.
You might notice that the front steps to the porch aren't shoveled. First, I was tired of shoveling and being a little bit lazy said to heck with doing that. Second, the porch is slick as snot with snow on it. I'm not sure I want to encourage passer by to come up here. As it is they are guided around to the back door by the cleared trails and driveway. Mail isn't delivered at the door anyway, we have a mailbox by the driveway.
About the machine, I've been worried about it. First of all it has a Tecumseh engine. The last machine I worked with that had a Tecumseh engine was Mom's lawnmower. The 10% ethanol fuel did it in. This one has been running but... I was having to run it with the choke wide open. Suddenly it started to die but I fortunately recognized that I need to close the choke. Ran like a champ for a while and then I had to open it up again. Back and forth for a while and then, under load, it ran quite well. It hasn't been serviced or run for three years now. I guess you can tell we've had a run of mild, snowless (relatively) winters. I suppose that this spring it will go in for a complete check up. Maybe they can also fix the tire that keeps going soft on me. One thing I love about it is that it is electric start. Plug it in and crank until it goes. Sometimes that's necessary. Either way it beats trying to haul on the pull cord.
One other thing I've learned is that I've got to plan out where to throw the snow. You see, our sidewalk is 18-20" below the grade of the yard to which I have to throw the snow. At the corners of the intersection of side-walk and driveway quite a lot of snow builds up very quickly. The machine can't heave wet snow further into the yard and it builds up quite a mound that tends to flow back into the drive or walk ways. Irritating. I need to solve that problem.
I also do my neighbor's side-walks and sometimes their front walks to help out. I wanted to do the whole block but the one neighbor always puts his leaves out on his walk for the city to pick up. They don't and then the frozen leaves are nothing but a barrier to the snow blower/thrower. In as much as we are legally required to clear our side-walks within 24-hours of the end of precipitation, I thought I'd help him out but, well, I don't think he's caught on.
We also clear paths for the mail delivery. No wading through snow for our mail! That's a lot of snow to move. I'm really glad I invested in a machine. My one neighbor is going to do so as well. The other has a son with one who lives just up the street and comes down to do the driveway for his dad. All together we'll get it done no matter what.
Friday, February 05, 2010
Good Habits Save Lives
I continually tell Nana and kids (when they are around) that habitually doing some things (including taking a different way home or turning on the outside lights at a different time each night) a certain way is a good thing. It ingrains each act such that when you are not quite yourself due to lack of sleep, distractions or unexpected chemical interference you will still do the right thing. It also eliminates memory as a check and relies on repetition. Tam had the same idea...
Thursday, February 04, 2010
Notes from the gun shop...
It is amazing to me that I am still so naive that I'm surprised that anyone would not consider their criminal past when filling out the paperwork (including the 4473) for the background check when buying/attempting to buy a firearm. Whatever you might think of the logic of denying firearms to any given segment of society, be it felons, drug addicted, former mental care recipients, etc, you must be struck by a system that allows prohibited persons an opportunity to violate a law.
Today's exhibit was a person who had been convicted of two counts of simple possession of a controlled substance, marijuana. Under Virginia law that person isn't permitted to purchase a handgun for five years. I thought it was forever, but was corrected. The person who had been denied the transfer claimed to have been unaware of the restriction and then told that they could purchase a rifle but not the handgun they had attempted to purchase. To my mind, a rifle is WORSE than a handgun but then I'm only thinking about destructive power. As we all know, concealability is the almost uniquely American bugaboo as regards firearms. In other countries, military chambering is considered the real threat, but I'm digressing.
So, this fellow comes back and applies to get a .22 LR rifle instead of the inexpensive small pistol he was planning on buying. He was once again delayed. I'm wondering what is going to happen next.
As an aside, a full 2/3s of our background check submissions were delayed. That isn't the norm. Some days less than 10% are delayed. It all depends on who happens to come in. Contrary to rumor, concealed handgun permit holders and law enforcement officers are just as likely to be delayed as other buyers.
The other thing that happened was a customer came in with the now old question of what loads are safe in a .357 Magnum rifle. Apparently there is a wide spread notion that normal .357 Magnum loads aren't safe/suitable for a .357 Magnum rifle. In my experience, by my reasoning, this is wrong.
In my revolvers and rifle, the loads which do not exceed the standard for the cartridge pressure will be safe in all arms which are chambered for any given cartridge. Exceptions might be antique arms chambered for cartridges originally loaded with blackpowder for which ammunition is currently made with smokeless powders. Maybe. I personally believe that if the maximum BP cartridge pressure isn't exceeded, guns in good, serviceable condition don't care about the powder used in the cartridges. However, this is a circumstance that doesn't apply to the .357 Magnum cartridge. The only real consideration of factory or handloaded ammunition which doesn't produce excessive pressures is whether or not the cartridge will function in the user's firearm mechanism. In other words if the exterior dimensions permit function and there are no excessive pressures produced by the combination of components all is well.
Apparently the people at Sierra have contributed to this idea by having, at some point in time, a suggested load(s) expressly for the .357 Magnum rifle. I'm still looking for a copy of the reference. Unfortunately, I don't have a copy of the Sierra manual.
Today was a lesson in misconceptions.
Monday, February 01, 2010
.40 Caliber Volcanic Rifle by Charlie
What a Sweet Little Rifle!
Trim, slender, beautifully proportioned, sexy little action, fun to look at, and fun to play with. Not only that, this is where it all began, "Lever Guns" that is.

The original Volcanic shot a short little bullet called the "Rocket Ball", it was less than .650" long and had very little power, but this Rifle had the genes to become the legendary Winchester. It goes like this;
- The Volcanic was enlarged to become the "Henry",
- The "Henry" was improved to become the "Winchester 66"
- The 66 was improved to become the "Winchester 73"
- The 73 was enlarged to become the 76.
- And then Mr. Browning came along with a much stronger, smaller action, and replaced the toggle link system, invented by Mr. Smith and Mr. Wesson, which was used in the Volcanics through the 1876.
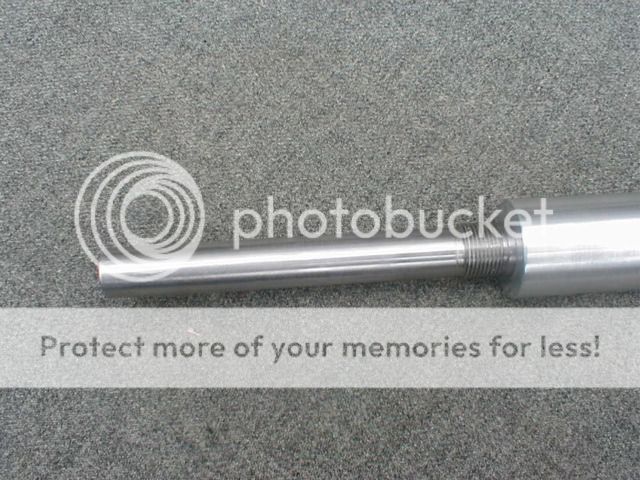
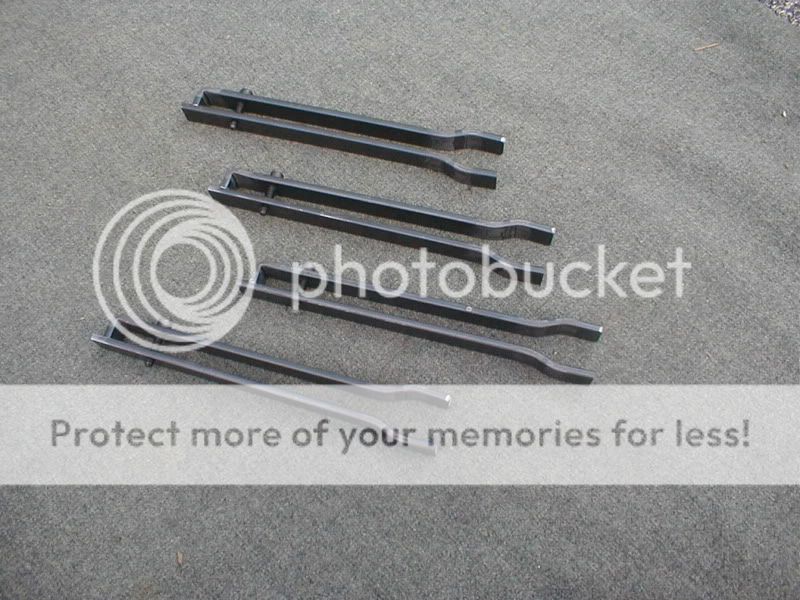
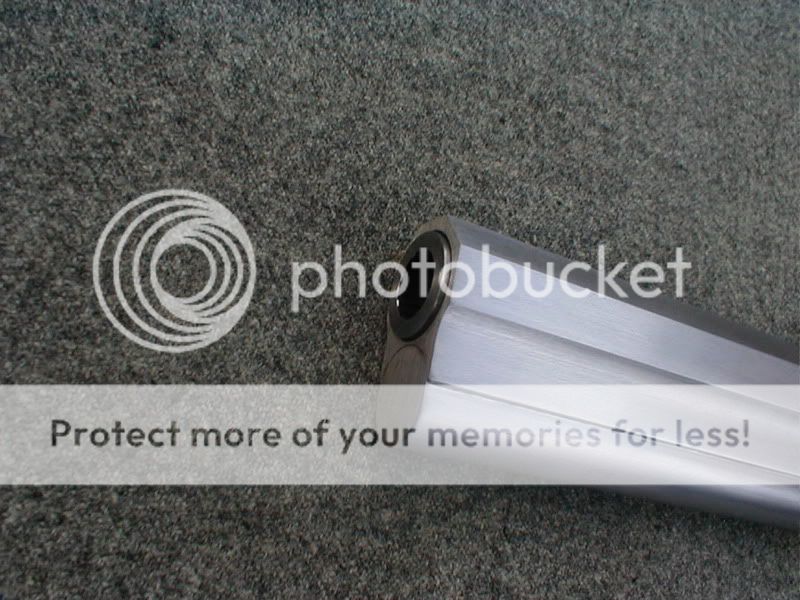
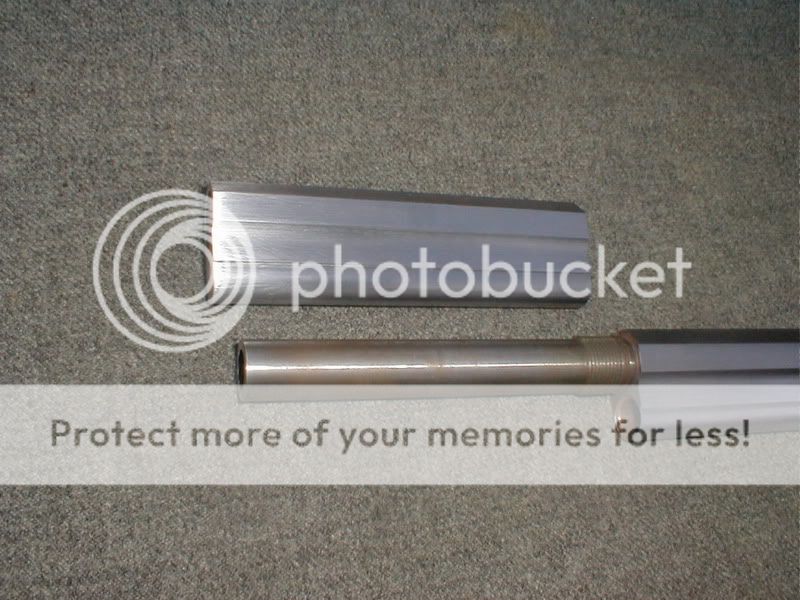
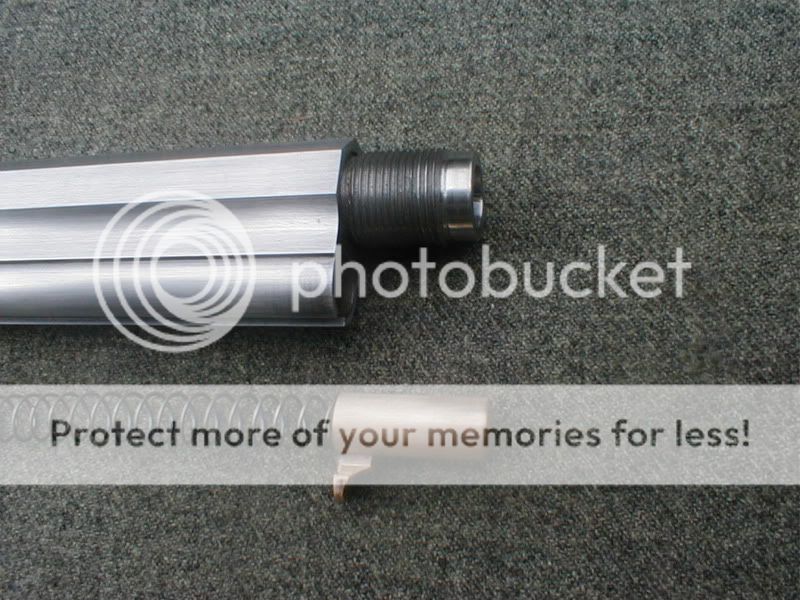
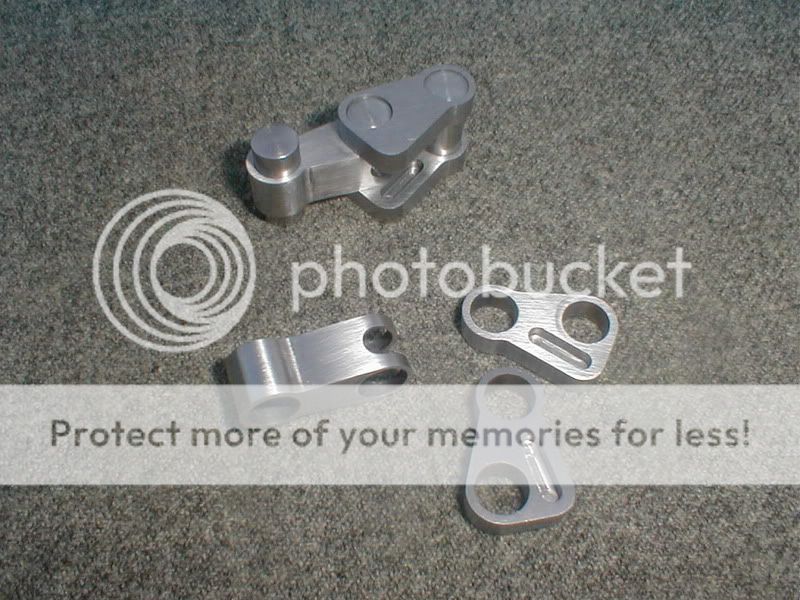
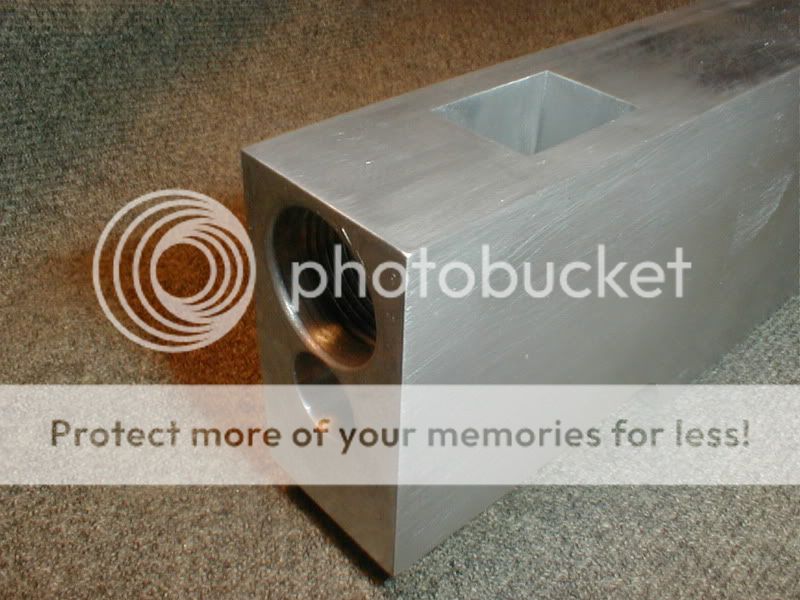
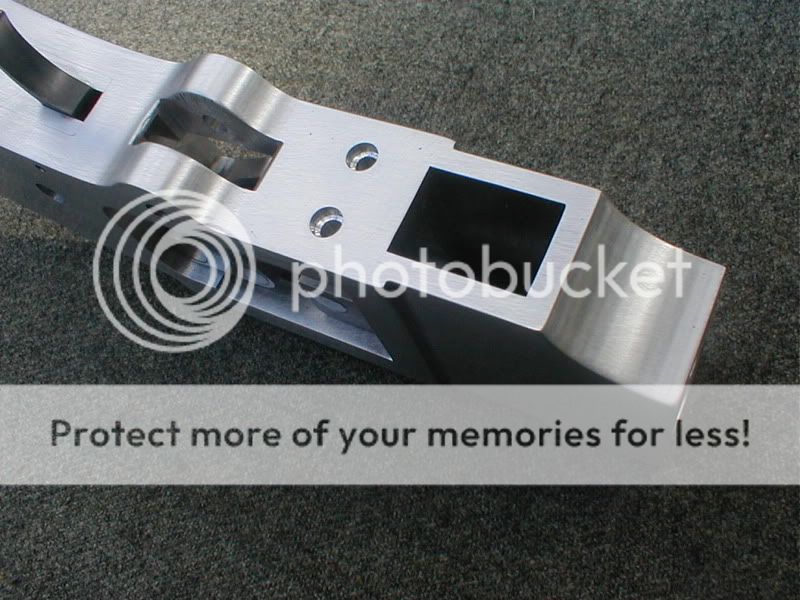
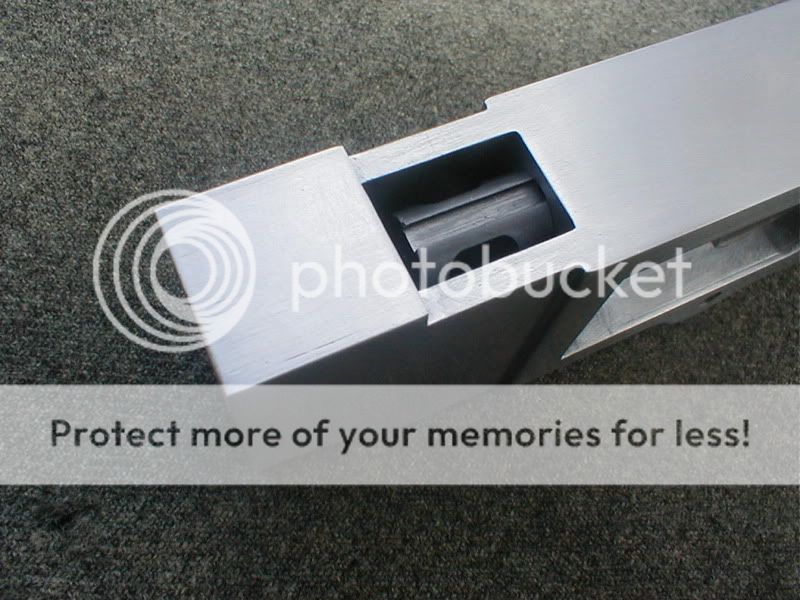
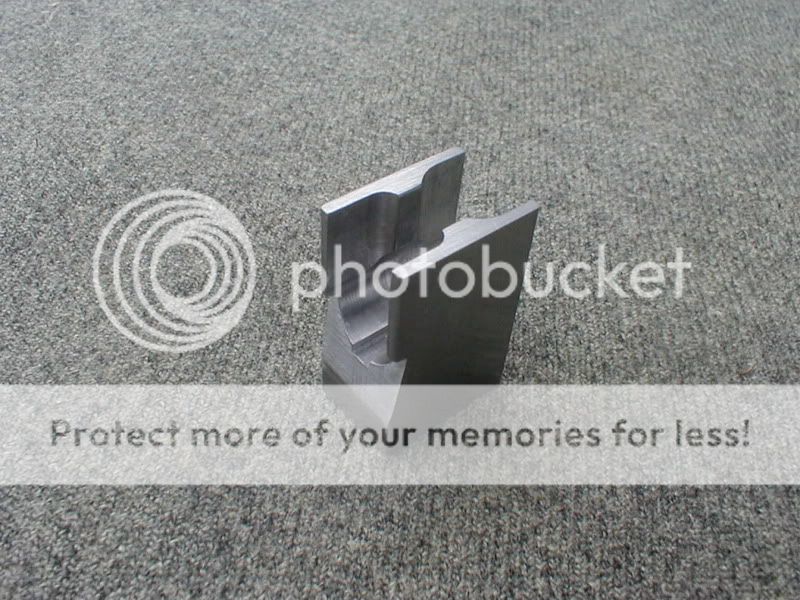
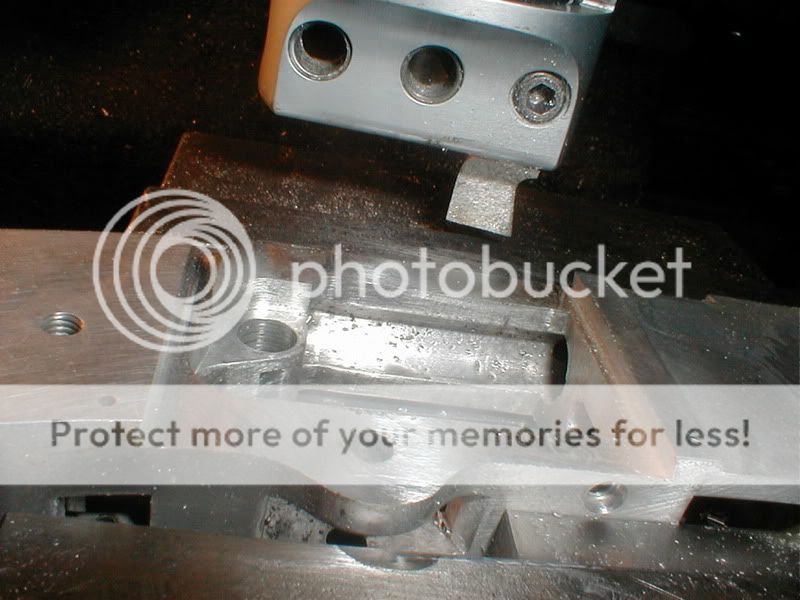
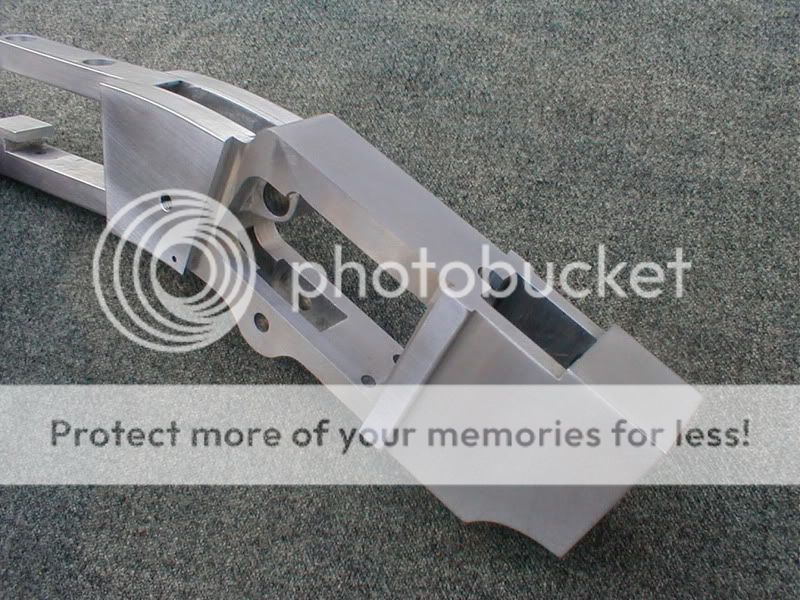
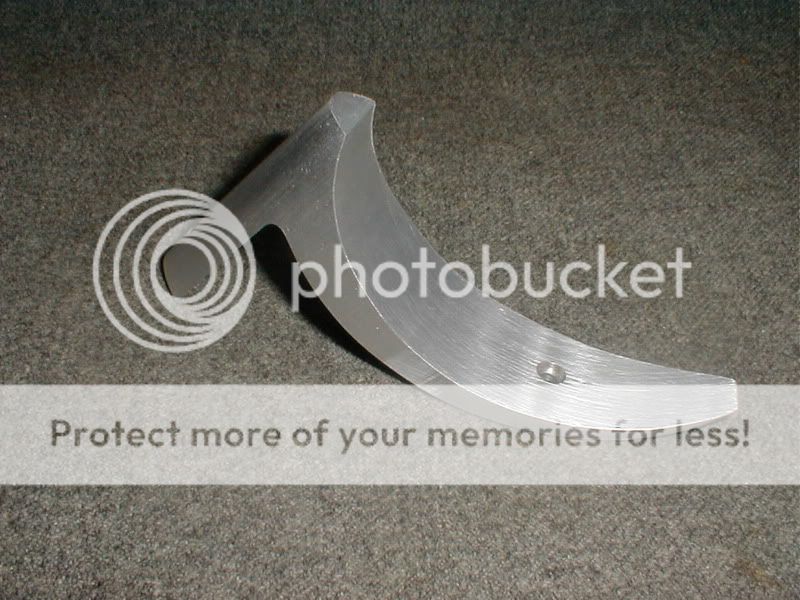
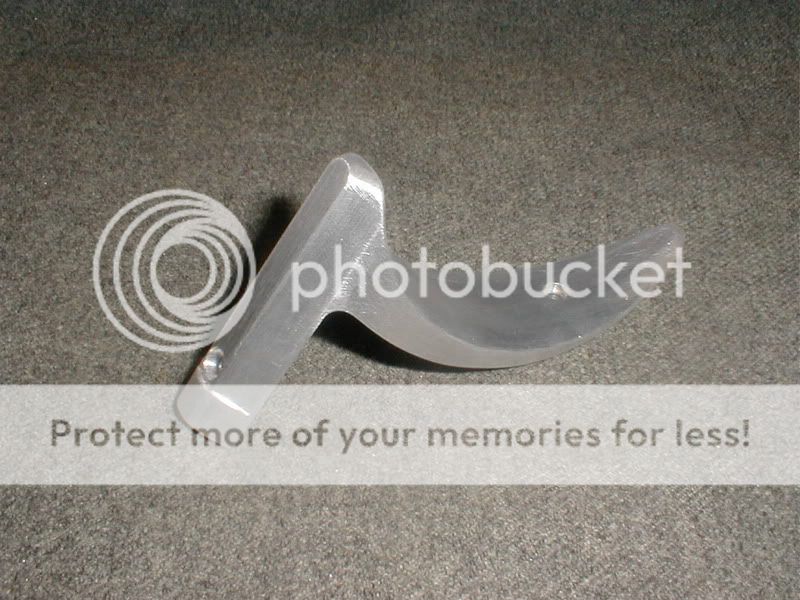
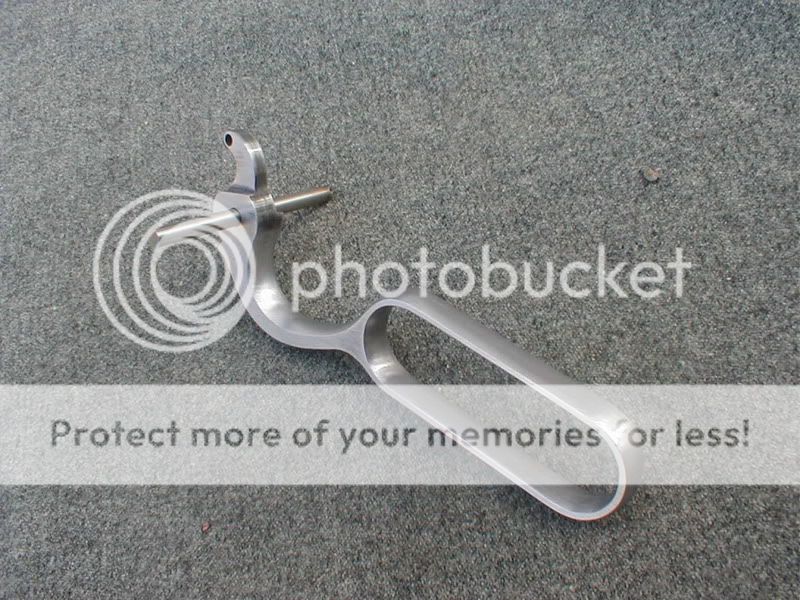
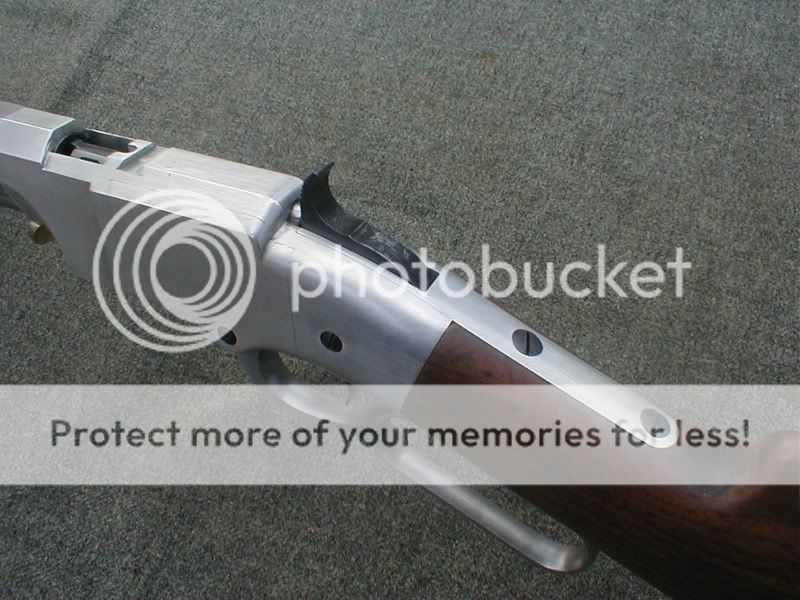
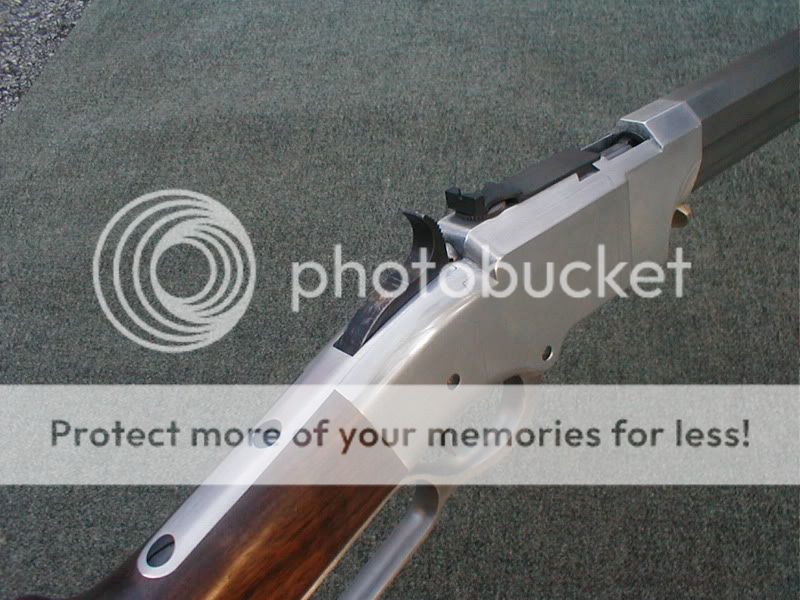
Above is my design, based on the toggle link system. My design is stronger than theirs, and easier for me to build. While designing this gun, I tried to copy the original dimensions and proportions. I do not have access to an original, so I have had to "scale" photographs to come up with what I have. The first problem I came to was this little action would not shuffle and shuck any available cartridges except the "22 Short"! This did not excite me so I designed my own "Wildcat 40". I will describe it to you later.
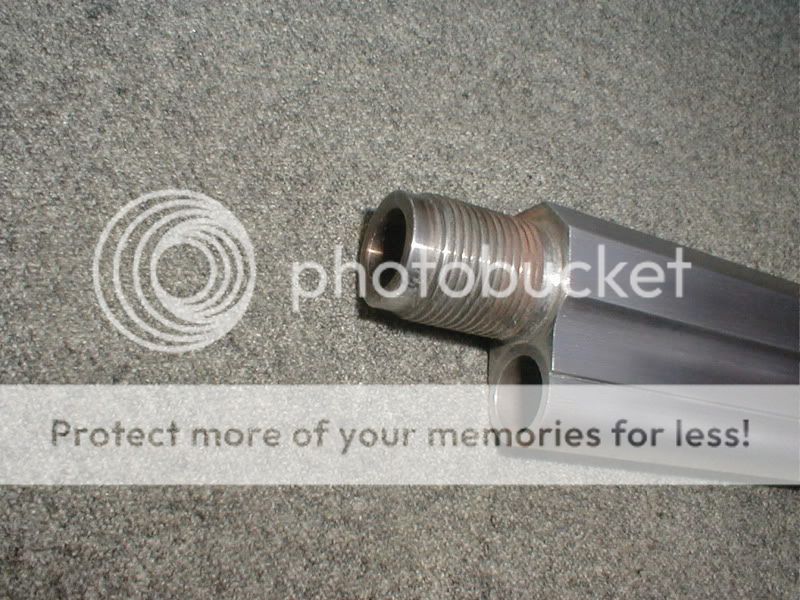
This is not a "kit" or a modification of another "Lever Gun". I will not be using purchased parts, or parts from other guns. I will use a purchased barrel blank from "Douglas" (40 Caliber, 1 in 14 twist) cut it, mill it, thread it, and chamber it for this rifle. Everything else, including the springs and most of the screws, I will make from scratch.
 In all my research, I have found this book to be the most informative. That's a Beautiful 20" Volcanic on the cover.
 About the cartridge that I'm shooting, It has been correctly noted that this gun will shuffle, shoot, and shuck the .22 Short, also the (sometimes available) .41 Derringer.
Even though these are an improvement over the original "Rocket Ball", I am not very impressed with either of them. The actual caliber of the #2 Rocket Ball was .41. So that is why I set out to develop my own cartridge.
I figured it like this, if I can't build my own cartridge, then I'm not gonna be able to build this gun.
I do agree somewhat with the guys that would want this gun in .22 Short, it's not for me, but it would make a nice little squirrel gun.
I shortened a 40 S+W case to .550". I reamed out the inside to accept the bullet. The cartridge shown is loaded with Berry's 135 grain copper plated bullet being shoved out of an 8" barrel at 1020 FPS in front of 4 grains of Bullseye. I have fired this Cartridge out of a 25" barrel and lost nearly 100 FPS! I don't like this load as it does show signs of excessive pressure. I have been shooting a 140 grain cast bullet in front of 3.5 grains of "Power Pistol", here I am getting 890 FPS, and visual inspection shows only moderate pressure. The Cartridges are shown in comparison to 22 Long Rifles.
I plan to leave the receiver it's natural color to mimic the silver plated brass ones that were offered for an additional $5.00! I would have hard anodized it except the side plates would no longer fit. The anodizing adds dimension to the parts, and they were very close to began with. I could have made them smaller, and the anodizing bring them to size, but that is a guessing game.
I know it's a lot of trouble making custom cartridges for this baby but I'm delighted with the way it shoots. That big 40 caliber bullet comes out of that barrel at a little over 900 FPS giving me about 280 foots pounds of energy. The recoil is very mild, and so is the noise. I don't feel the need for hear protection. I have shot it several times inside my closed garage!
She weighs about 5 pounds and 4 ounces, but she will hold 21 cartridges, and that will add appreciable to the carrying weight.
Charlie says about himself and his project,
Trim, slender, beautifully proportioned, sexy little action, fun to look at, and fun to play with. Not only that, this is where it all began, "Lever Guns" that is.

The original Volcanic shot a short little bullet called the "Rocket Ball", it was less than .650" long and had very little power, but this Rifle had the genes to become the legendary Winchester. It goes like this;
- The Volcanic was enlarged to become the "Henry",
- The "Henry" was improved to become the "Winchester 66"
- The 66 was improved to become the "Winchester 73"
- The 73 was enlarged to become the 76.
- And then Mr. Browning came along with a much stronger, smaller action, and replaced the toggle link system, invented by Mr. Smith and Mr. Wesson, which was used in the Volcanics through the 1876.
Above is my design, based on the toggle link system. My design is stronger than theirs, and easier for me to build. While designing this gun, I tried to copy the original dimensions and proportions. I do not have access to an original, so I have had to "scale" photographs to come up with what I have. The first problem I came to was this little action would not shuffle and shuck any available cartridges except the "22 Short"! This did not excite me so I designed my own "Wildcat 40". I will describe it to you later.
This is not a "kit" or a modification of another "Lever Gun". I will not be using purchased parts, or parts from other guns. I will use a purchased barrel blank from "Douglas" (40 Caliber, 1 in 14 twist) cut it, mill it, thread it, and chamber it for this rifle. Everything else, including the springs and most of the screws, I will make from scratch.
 In all my research, I have found this book to be the most informative. That's a Beautiful 20" Volcanic on the cover.
 About the cartridge that I'm shooting, It has been correctly noted that this gun will shuffle, shoot, and shuck the .22 Short, also the (sometimes available) .41 Derringer.
Even though these are an improvement over the original "Rocket Ball", I am not very impressed with either of them. The actual caliber of the #2 Rocket Ball was .41. So that is why I set out to develop my own cartridge.
I figured it like this, if I can't build my own cartridge, then I'm not gonna be able to build this gun.
I do agree somewhat with the guys that would want this gun in .22 Short, it's not for me, but it would make a nice little squirrel gun.
I shortened a 40 S+W case to .550". I reamed out the inside to accept the bullet. The cartridge shown is loaded with Berry's 135 grain copper plated bullet being shoved out of an 8" barrel at 1020 FPS in front of 4 grains of Bullseye. I have fired this Cartridge out of a 25" barrel and lost nearly 100 FPS! I don't like this load as it does show signs of excessive pressure. I have been shooting a 140 grain cast bullet in front of 3.5 grains of "Power Pistol", here I am getting 890 FPS, and visual inspection shows only moderate pressure. The Cartridges are shown in comparison to 22 Long Rifles.
I plan to leave the receiver it's natural color to mimic the silver plated brass ones that were offered for an additional $5.00! I would have hard anodized it except the side plates would no longer fit. The anodizing adds dimension to the parts, and they were very close to began with. I could have made them smaller, and the anodizing bring them to size, but that is a guessing game.
I know it's a lot of trouble making custom cartridges for this baby but I'm delighted with the way it shoots. That big 40 caliber bullet comes out of that barrel at a little over 900 FPS giving me about 280 foots pounds of energy. The recoil is very mild, and so is the noise. I don't feel the need for hear protection. I have shot it several times inside my closed garage!
She weighs about 5 pounds and 4 ounces, but she will hold 21 cartridges, and that will add appreciable to the carrying weight.
Charlie says about himself and his project,
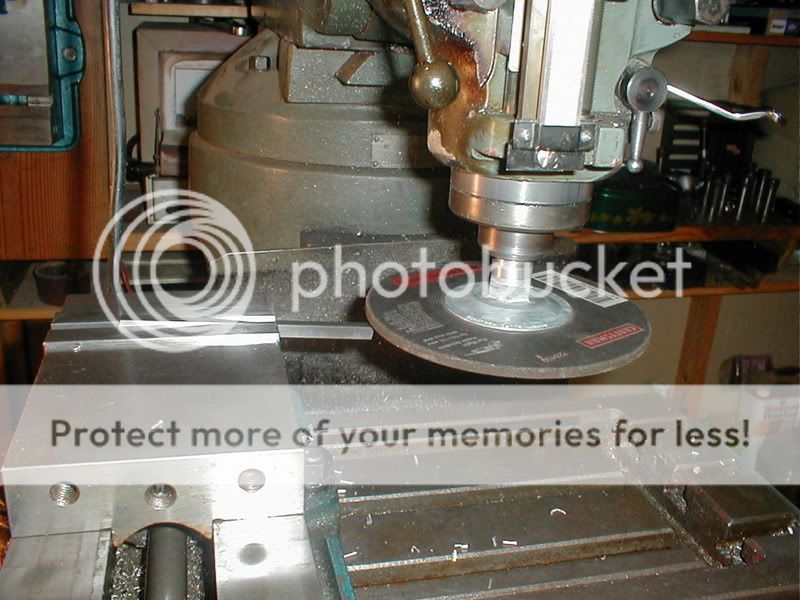
I am a mechanical engineer and machine designer. I was a machinist a long time ago. I have a "Bridgeport" and a "1955 Tool Room Hendy". I also have a small, but very robust "CNC Tabletop Mill", which I built myself.
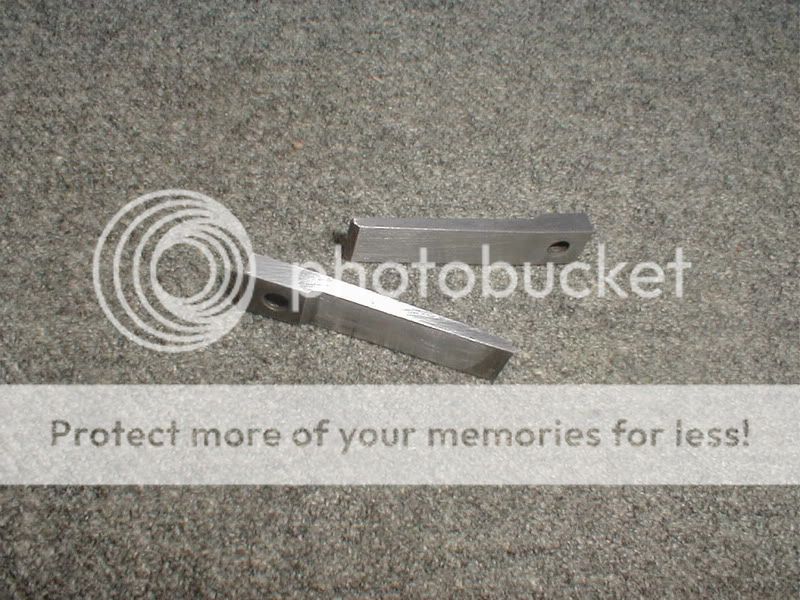
I started trying to figure out how to do a modern Volcanic seven or eight years ago. I have gone through 5 or 6 different designs for the mechanism, spent nearly a year learning and making a 40 caliber barrel, I mean doing the rifling and all. I still can not do a long barrel (over 8") so I had to use a blank here. Since I am not doing this for profit, I don't worry about time at all. Those 2 screws ( hammer and lever) cost me about 4 hours, design machining, and heat treating. And that's just 2 silly little screws that you think I would purchase at a hardware store for less than 2 bucks! So here I have 4 hours invested in 2 screws, at 65 or 75 dollars an hour (standard machine shop time) dem babys are expensive! Take a drawing of these 2 screws to a job shop, you already have the design, all the man has to do is purchase the material and machine them out, then heat treat em. Tell him you don't want any favors, tell him to charge his standard rate, see what he says!
You gotta love it man, if you don't, you will never invest this time and effort. How much time? It's a life style man.
Now I am a pretty good machinist, and I can compete with professional machinist in the time it takes to make a part, but then I am the one who designed that part. How long was I thinking about what that part would look like, and how would I make it? It would take appreciable time to go back and estimate the time, and materials and design for each part. I would much rather take this time required to estimate, and make some more parts. So what would I charge to make this gun for some one else? At this time, I would not take such a commission.


