Sunday, July 25, 2010

Field Stripping the M1 "Garand" Rifle, caliber .30

I needed to provide a friend with instructions and found this at the CMP site.
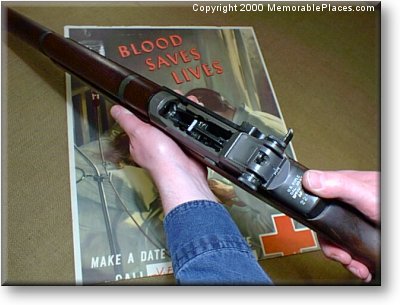
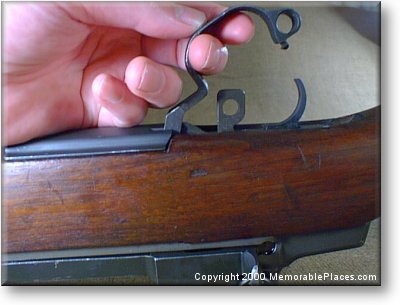
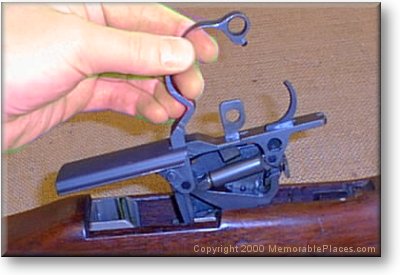
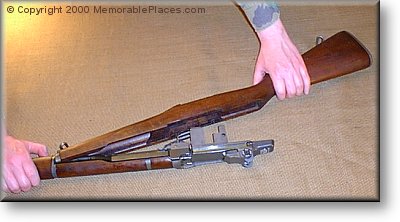
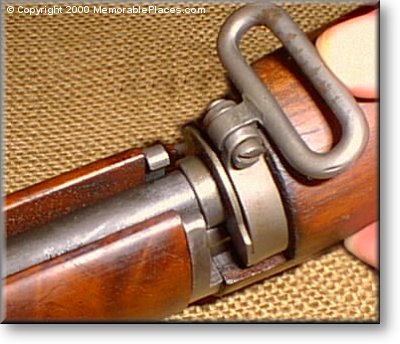
Field Stripping The M1 Garand
 
Few things in life are easier than field stripping an M1 Garand Rifle. Just as people were impressed many years ago with how easy it is to tear down a Model 1911 Colt pistol, they are smitten with the elegant simplicity of the M1 Garand. 
 
Unload, empty, clear, check, or by whatever word you use make sure weapon is EMPTY - photo (C) 2000 MemorablePlaces.com
Check to make sure the rifle is unloaded! Note the W.W.II era blood drive poster. You don't need a transfusion from doing something stupid.

The first thing to do when preparing any work on any firearm, and indeed any time you so much as pick up a firearm is to 'clear' it. This simply means checking it fully and completely to make sure that it is not loaded and that no rounds, or shell casings remain in the magazine or chamber.

Even after clearing the weapon still make damn sure that the muzzle is always pointed in a safe direction. Never handle weapons when exhausted or under the influence of anything stronger than Pepsi-Cola.

If you ever run across any firearm that you are not 100 percent sure exactly how to check it to make sure it is unloaded, DON'T touch it. Get help from someone who knows what they are doing.
When the weapon is totally safe start field stripping by removing the trigger group...

Removing The Trigger Group
First, release the bolt and let it slide forward in a controlled manner.
Pull up and back on the trigger guard - photo (C) 2000 MemorablePlaces.com
Rotating the trigger guard up and forward (toward the muzzle).

Next invert the weapon and firmly pull back (toward the buttstock) on the rear portion of the trigger guard. On milled triggers some people place a dowel through the hole in the rear portion of the guard in order to obtain a little more leverage.

Pull up and forward (toward the muzzle) on the trigger on the trigger guard. Since we have previously cleared the weapon, we do not have to cock it. However had the weapon foolishly not been cleared, performing this action would have cocked the hammer and locked it into the down position.

Lifting the trigger group out of the rifle

Next pull straight up on the trigger guard. This will free the trigger group from the buttstock of the rifle. It does not take a lot of pulling to do this. If anything sticks at this point there may be a problem.

Now set the trigger group aside in a safe place and then prepare to go to the next step:

Removing the buttstock from the rifle...

Removing The Stock From The Rifle
After setting the trigger group aside grab the forward handgrip with one hand in order to hold the barrel and receiver in position. Grab the buttstock somewhere around the comb and carefully rotate the buttstock up and off of the receiver legs.

Note how the stock is rotated off of the receiver
Note the relationship of the ferrule to the front handgrip on the receiver.

We now have three distinct groups of parts. The barrel and receiver group, the buttstock, and the trigger group.

If you want to disassemble the rifle further you need to detail strip it.

No comments: