I was reading the other day about barrel stubbing and a member of some forum asked about it. I responded that barrel stubbing was a good option in some instances and another member posted that he thought it was so much "stuff". I think that is silly as many double barrel shotguns have been made on the monobloc system which attaches the barrels to a block in a similar manner. In fact, I think that many simply don't understand the process. So, I thought that I would republish this article that David wrote concerning the process. He says that he'll be updating the article and photos and republishing on his own website soon.
 This project was bankrolled by a Bellm forum member who planned for David White to stub the barrel with a match barrel and rechamber in 308 Bellm. A 21" Shilen Stainless Select Match Barrel in 30 caliber with a 6-groove, 1x10" twist was purchased. The new barrel was to be cut to 16" and a brake added. The scope mount base was to be modified to 5-screw. The forearm was too be bedded. He did the trigger work himself.
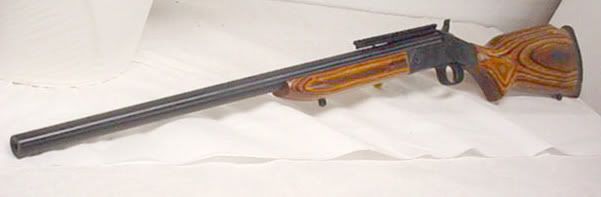
Rifle before the work and is an H&R Ultra 243 Winchester. These rifles currently sell for about $300. One of these with a 12 ga. shotgun barrel would be a great first gun for most young hunters. Being able to chamber for cartridges other than those offered by H&R can be a benefit for those owners who already have or have had guns chambered for cartridges for which they already have brass and bullets in quantity.
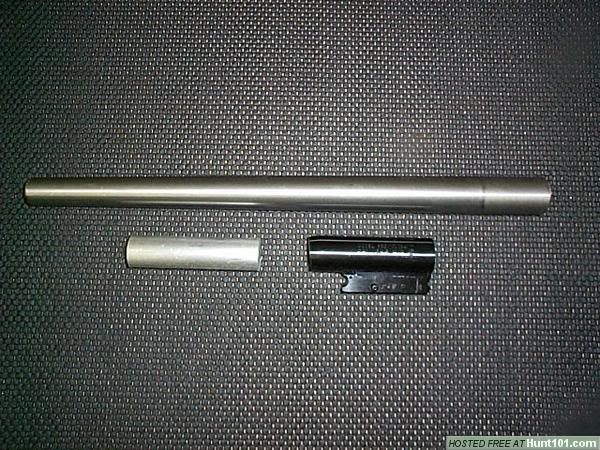 Shown next is the Match Grade Stainless Steel barrel that will be threaded and chambered, have an extractor slot cut cut into it and will eventually be screwed into the barrel stub, bottom right. This will become a better than new CUSTOM barrel for this particular H&R. The piece to the left of the barrel stub is what will eventually become the 4" "MAXIMIZER™" brake that will be machined and screwed onto the muzzle end of the barrel and will look like it is part of the barrel itself....
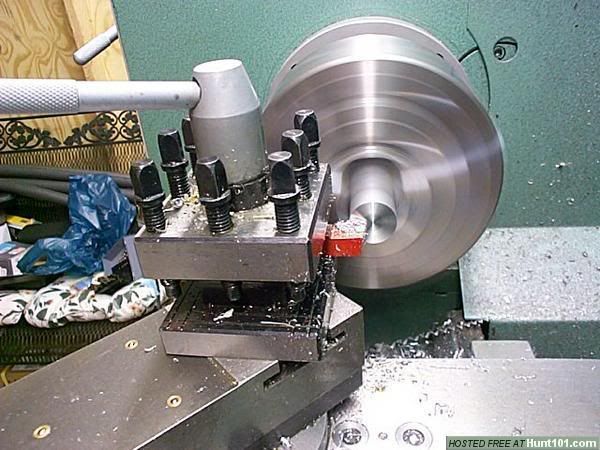 The 4" aluminum bar stock is faced off.
 After being faced and center drilled, David drills the EXPANSION CHAMBER in "steps" until it reaches it's final size, which in this case will be - 11/16".
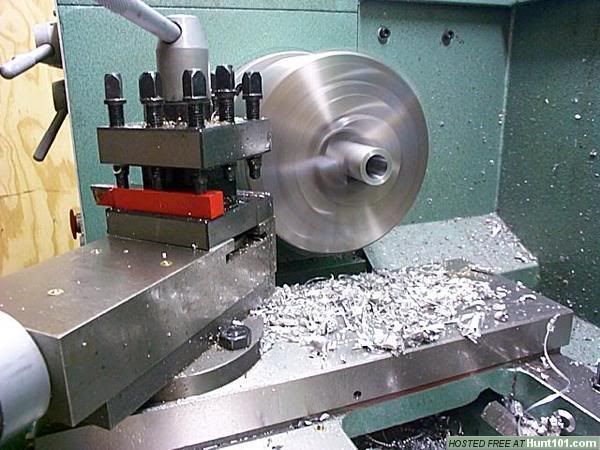 This piece of 1" diameter bar stock has been drilled to 11/16" and stops 3/8" short of the other end. It is now ready to be threaded.
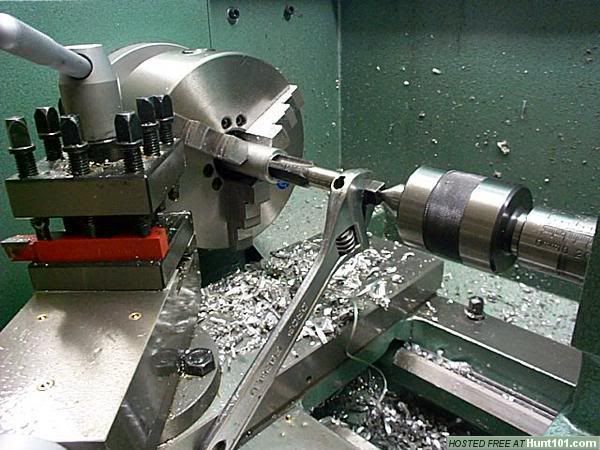 The brake is being threaded to 3/4-16. There will be a 3/4" length of the barrel that is threaded to accept this brake....
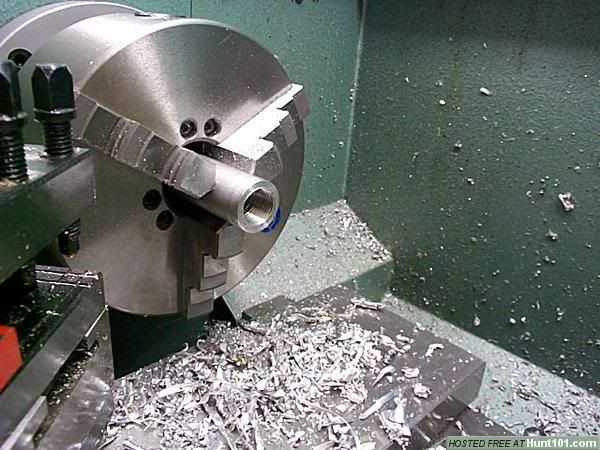 This is the brake after it has just been threaded and will receive a light clean-up pass to remove the burr from threading....
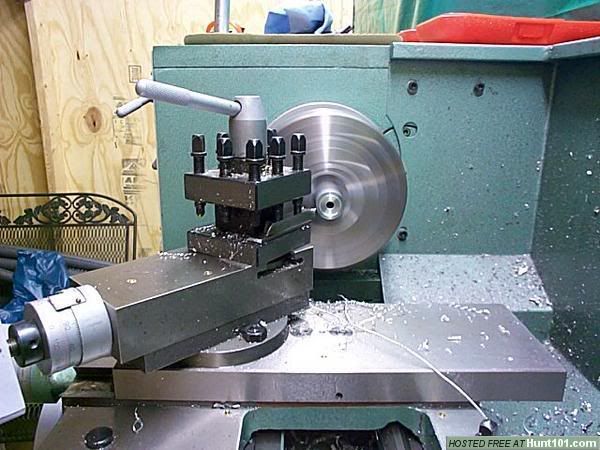 After the brake has been threaded and faced, it is removed from the lathe, swaped end and faced, center drilled, crowned and then open the exit pupil to .030 over bullet diameter, which in this case will be .338 since it is for a 308 and that will allow .015 per side bullet clearance....
 After most of the work has been finished in the lathe, it is set-up in a cross-slide and marked top dead center with the brake being set for a rearward angle of the porting and with the hole spacing set at a predetermined distance....
 Porting the brake with 6 rows of 4 ports......
 Completed brake.
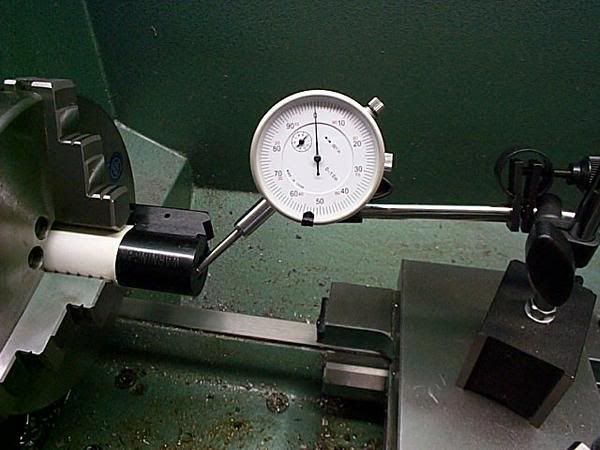 The chamber is being dialed-in to plus or minus .0003, but in this case, it mics in at .0001.....
 The chamber is being bored true, which in this case, did not take much to do.....
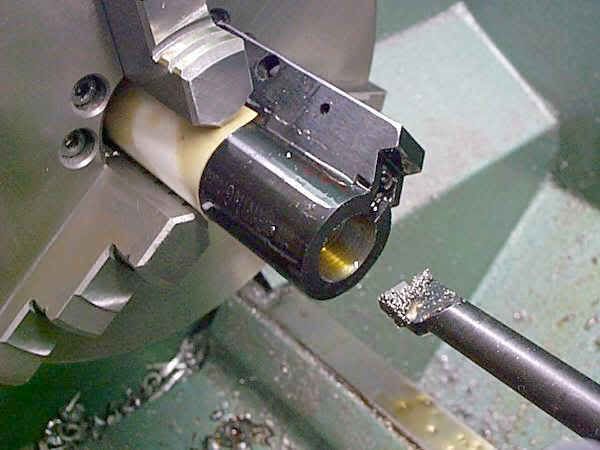 Here, the barrel stub has just been bored to it's final size......
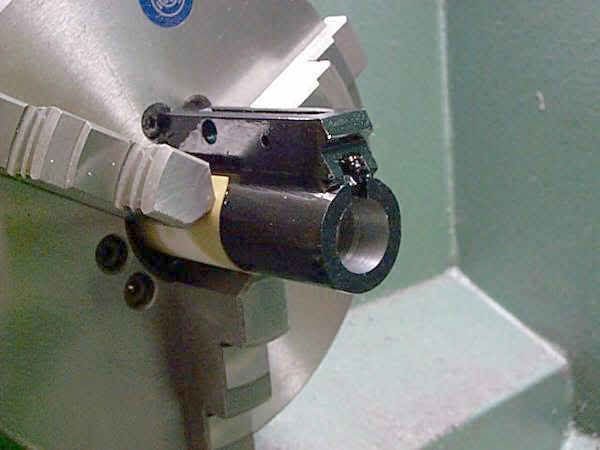 With the boring operation now complete, it is now ready to be internally threaded. What is not shown and we could not get a good picture of, is the three different shoulders or steps that were bored into the stub. These will easily be seen on the barrel itself before it is threaded. The 3/8" section that you see here, will serve as a front "guide" to help with any possible misalignment when the barrel is screwed into the stub...
 Here, the barrel stub is being internally threaded to the size of 13/16-16tpi.....
 This is the end in which the barrel is screwed into and has been faced at a perfect 90 degree angle to the bore and thread. The front 1/2" section that you see that is not threaded, acts as a guide and helps correct any misalignment between the barrel and stub when they are finally mated together.....
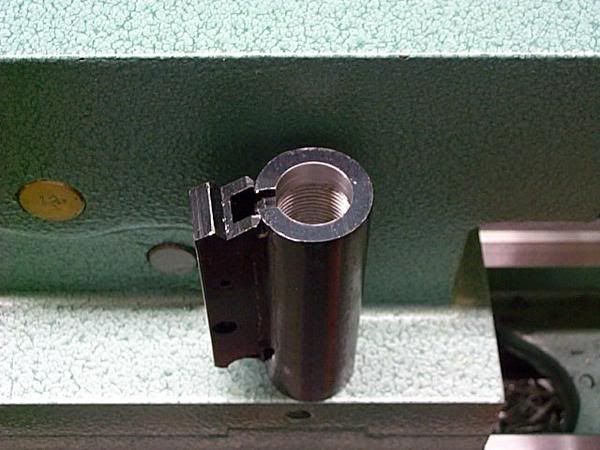 This is the chamber end that shows where the secondary internal shoulder is as well as the front barrel guide....
 Just getting started on the barrel itself....
 Here, the barrel was turned to EXACTLY match the internal dimensions that were bored into the barrel stub itself. The right end, towards the tail-stock, was turned to a diameter of .712 with the secondary shoulder for when the barrel and the stub are screwed together. The long straight shank section in the middle was turned to .8125 with a relief cut directly to the left of it. Then there is the barrel shoulder. The barrel was turned to 1.112 so as to match the diameter of the barrel stub and then tapers down....
 The barrel was threaded to 13/16-16tpi.....
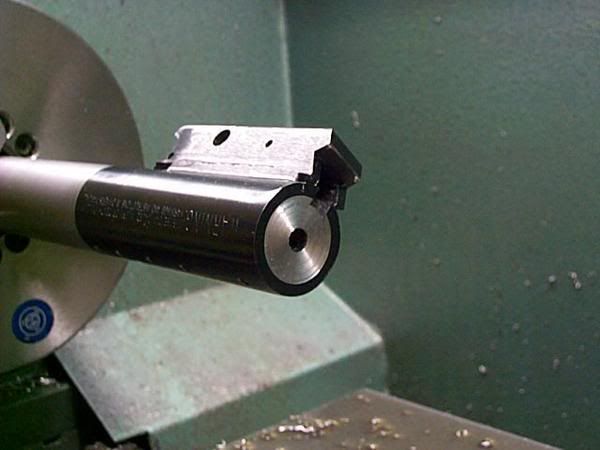 The barrel and stub are finally mated together to check for fit. Next will be the extractor slot being cut followed by light clean up passes on the barrel face, chambering and final polishing and finishing...
Now onto the trigger work.........
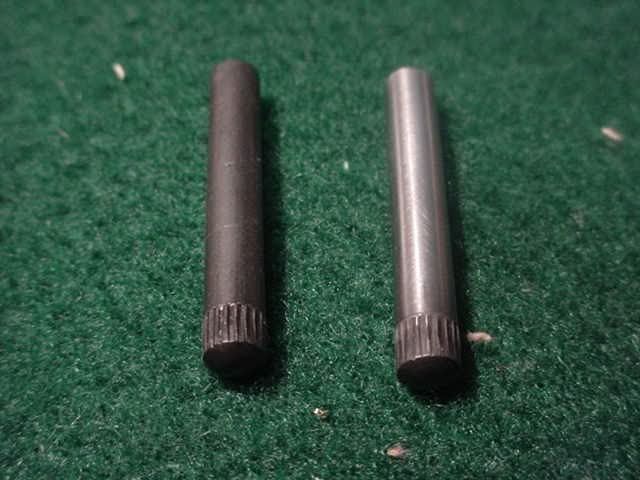 Stock trigger broke at 4 lbs 5 oz. for an average of 10 pulls. The trigger group is held in with pins that are splined on one end, so they have to be driven out from opposite side.
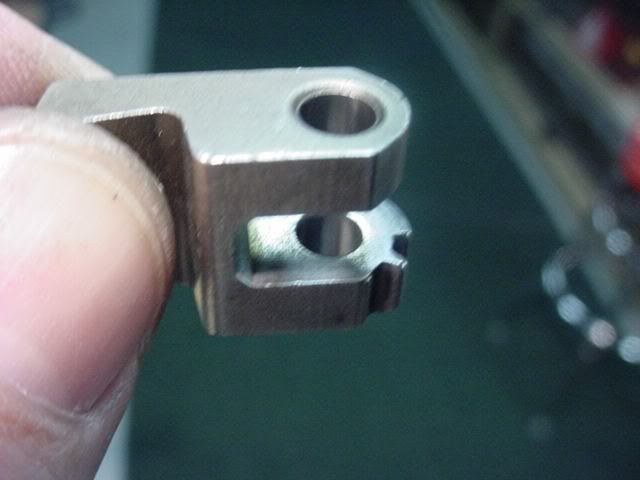 Polished all of the retaining pins with 600 grit wet-or-dry sandpaper. Note rub marks on unpolished pin.
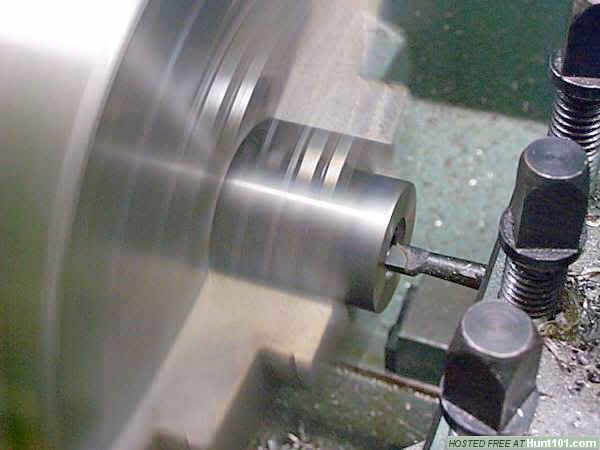 On the trigger group I smoothed all of the through holes with 600 wrapped on a punch. Polished the trigger, hammer and lifter/transfer bar where they contacted. Stoned the trigger sear and hammer.
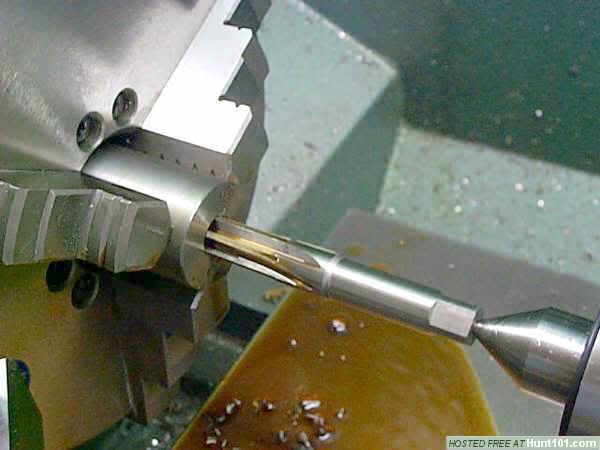 Also sanded the barrel catch on both inner sides of the open slot.
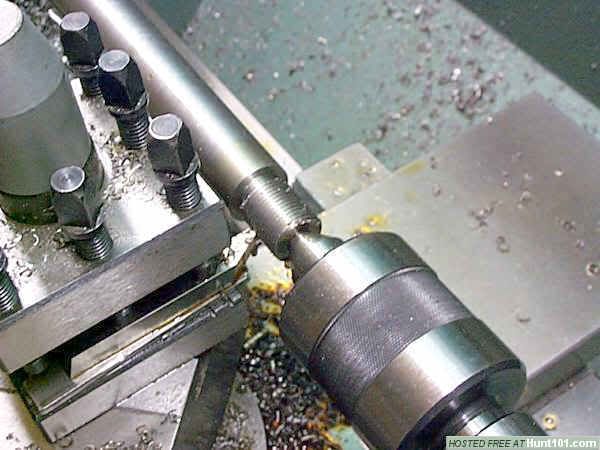 All parts were lubed and then assembled. Trigger pull was then tested....not much better. Disassembled again and stoned the sear and hammer some more. Reassembled and tested again. Must have gotten a little "carried away" on the second stoning as the pull now measures 2 lbs 11 oz for a 10 pull average. A little lighter than I planned......
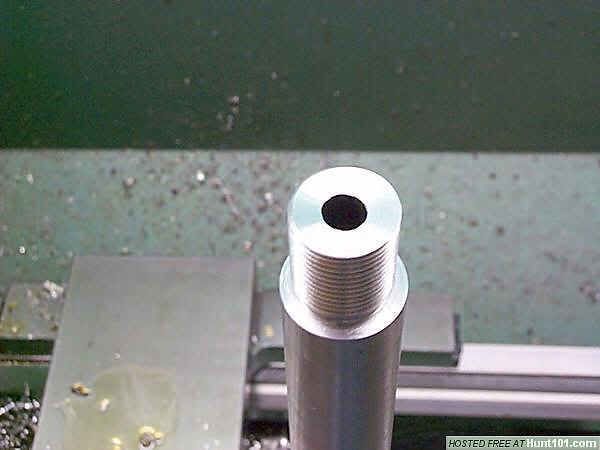 The rim counter bore is being cut here as well as the chamber being bored true to the bore...The chamber is being cut for the 308 Bellm...Barrel is being threaded to accept muzzle brake...The muzzle end has been cut to a precision 11 degree target crown...
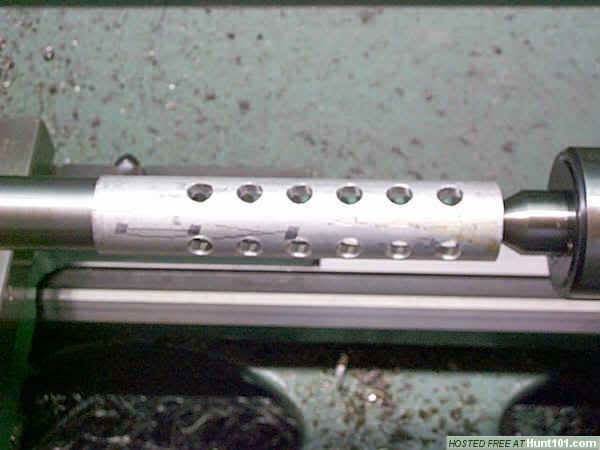 Muzzle brake bas been indexed and red loc-tited in place and is now ready to be turned down to match barrel diameter...
 The barrel and brake have been turned to contour and filed for a proper finished look and then they will be polished...
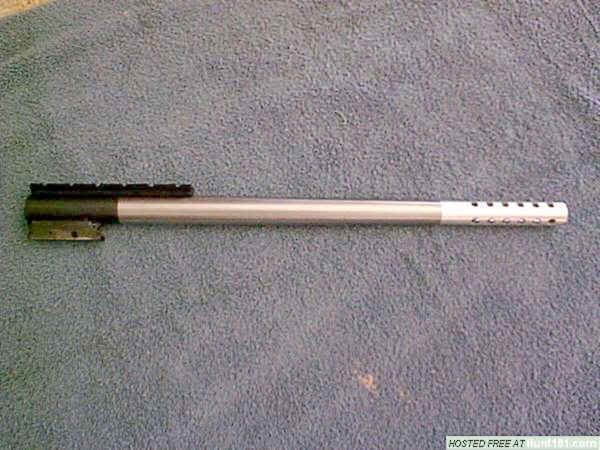 Barrel is now completed!


No comments:
Post a Comment