"Grizzly" Adams of New Mexico offered to convert some brass for my .45-75 and I took him up on 10 pieces to see how his method using the CH Tool tapered expanders compared to my ad hoc method using expander dies from the .375, .429 and .457 cartridges which I had on hand. He was able to return the cases to me very quickly and they arrived Friday, May 25.
I must say that, before fireforming, his cases are neater in appearance and with smoother necks. They also seem to be more concentric. Next step is to fireform all the cases and trim to final length. I'll let you know how these cases look after fireforming.
Tuesday, May 29, 2007
Saturday, May 26, 2007
STOL Competition - Amazing
I take it these planes don't have a load but, wow! These are airplanes, not helicopters. Absolutely fantastic and worth sharing. Thanks to Mr. Completely for posting this for me to see.
Thursday, May 24, 2007
.50-90 Sharps Brass and the .45-75 Winchester
The Starline .50-90 Sharps brass arrived today. I don't think it will do for .45-75 as is because the rim diameter is just too much larger to avoid turning it down. I haven't measured it yet, but it won't fit in the .45-75 shell holder. Nothing lost though, I've been thinking of a .50-90...
I also got the Lyman 457122 mold and I'm chuffed about that. Just need time to cast some up (and a sizing die and top punch for my sizer...)
I also got the Lyman 457122 mold and I'm chuffed about that. Just need time to cast some up (and a sizing die and top punch for my sizer...)
Ticks!
 I know many will chime in with more experiences and advice, but I just wanted to caution all the "uber outdoorsmen" here to use tick repellents and to look for ticks and to remove them correctly/carefully. Rocky Mountain Spotted Fever, Lyme Disease and other debilitating diseases from ignoring these precautions can happen to any of us.
 I was reminded of this this morning by a fellow who had a tick get him just behind the knee. His symptoms were like the worst kind of flu (less nausea and diarrhea) plus dementia and vertigo. He's on some sort of anti-bacterial medication but still, nearly 2 weeks later, has "bad days".
If you have a tick bite and notice any symptoms, get to a doctor!
Wednesday, May 23, 2007
Bathroom renovations continue...
Yep, the renovations continue... to get my goat! What a royal pain! I no sooner get the old big mirror cut to new dimensions than the electricians put the GFI outlet in the wrong place which requires I take the mirror back to be shortened. I love my wife but she's right, we don't speak the same language. My language is the language/jargon of the trades and hers is the language of her "vision" (the single best word that describes what she imagines). I speak in specifics and she in generalities which she thinks I must understand. She has a vision, the general parameters of which she can communicate to one and all. But the devil is in the details. I simply can not always understand what she means. Much hair pulling, were my hair longer, results from this. It should be very nice once we get it done. After all, she has very nice visions!
Tuesday, May 22, 2007
Fast and Fancy Revolver Shooting
It always amazes me that there are folks that can do this. Of course they can shoot this fast and well because they practice so it really isn't the shooting that amazes me. What amazes me is that the guys found a wife that supports this kind of fun.
Miscellaneous
Bought a single box of Hornady .308 220 gr. RN bullets yesterday. $30. Prices just keep going up. Read this topic on The Perfect Union. I suggest that you do as I've been recommending and get the components and rimfire ammo you can afford, now. The prices will only go up. Those bullets I bought yesterday cost $20 a year ago.
I've also order 20 ea Starline .50-90 Sharps cases to convert to .45-75 (well some of them), just to see how it works. Having a number of cases I can convert and knowing what they are will enable me to take advantage of good prices should I be so lucky.
I also ordered Lyman mold 457122 for the 330 gr. HP bullet that works in the .45-75. I've now got to get a sizing die and top punch for my sizer.
Grant Cunningham must have started the plumbing problems. I've got one I need to resolve, hopefully today. How a drain from a sink and a washer gets clogged is beyond me. Maybe there's a sock in there?Anyway, I've got a cast iron nipple I can't get loose even after heating and penetrating oil. I'm going to try a breaker bar and then, if that doesn't work, call a plumber. *sigh* The breaker bar worked a charm and the nipple turned right out. Hard to know how soap scum and dirt clog a drain! Seems clear now and the washer drains with out backing out the drain pipe.
Back to the .45-75, a friend has been sent 10 .348 Winchester cases to see if his CH Tool die set will convert the cases better than my previously noted ad hoc system. Maybe I'll have them next week and be able to report on the comparison.
In the for-what-its-worth department, Ten-X has had my ammo order for 2 boxes of .45-75 ammo, paid for, for 2 weeks now and not a word as to back order. Since they are using Jamison brass and everyone is backordered, I'd presume they are backordered as well. However, they've not had the courtesy of a notification. What's up with that?
In stark contrast, Buffalo Arms telephoned me immediately after receiving my order to let me know that my order for 1 box of their ammo and 50 cases was backordered and they had no idea when they could deliver. Big difference in customer service. What do you think that means so far as my future purchasing choices?
I've also order 20 ea Starline .50-90 Sharps cases to convert to .45-75 (well some of them), just to see how it works. Having a number of cases I can convert and knowing what they are will enable me to take advantage of good prices should I be so lucky.
I also ordered Lyman mold 457122 for the 330 gr. HP bullet that works in the .45-75. I've now got to get a sizing die and top punch for my sizer.
Grant Cunningham must have started the plumbing problems. I've got one I need to resolve, hopefully today. How a drain from a sink and a washer gets clogged is beyond me. Maybe there's a sock in there?
Back to the .45-75, a friend has been sent 10 .348 Winchester cases to see if his CH Tool die set will convert the cases better than my previously noted ad hoc system. Maybe I'll have them next week and be able to report on the comparison.
In the for-what-its-worth department, Ten-X has had my ammo order for 2 boxes of .45-75 ammo, paid for, for 2 weeks now and not a word as to back order. Since they are using Jamison brass and everyone is backordered, I'd presume they are backordered as well. However, they've not had the courtesy of a notification. What's up with that?
In stark contrast, Buffalo Arms telephoned me immediately after receiving my order to let me know that my order for 1 box of their ammo and 50 cases was backordered and they had no idea when they could deliver. Big difference in customer service. What do you think that means so far as my future purchasing choices?
Monday, May 21, 2007
My Browning 1895 - UPDATED
 It is a crappy photo. I simply haven't had the time to do better.
Some guns are just easier to shoot well than others. This one has the firing pin strike slightly off center but it has yet to be a problem. It hangs well, the trigger is pretty good (I'm a trigger insensitive kinda shooter, if it doesn't take two fingers to pull it doesn't much bother me.), and the sights are at just the right distance that in the right light I can do well with them.
Processing 100 cases now for a 220 gr. bullet load. My goal is 2000 to 2100 fps. It is much cheaper to run such a load in a .30 than a .31. This isn't difficult to do with IMR or Hogdon 4350 and produces a round the penetrates and kills well without excessive recoil.
I haven't gotten the Ukranian Lyman 38 reproduction sight installed yet but hope to go do this soon. This will make the rifle really useful as it will give a wide range of adjustment.
Here's a video about the 1895 rifle...
Originally posted 11/9/2006
Lyman Remington 1858 New Model Army
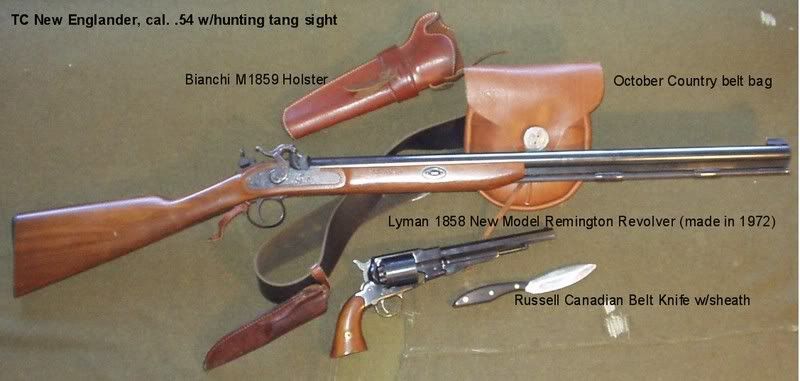 I got this Lyman marketed Italian reproduction of the Remington 1858 New Army revolver, caliber .44, in 1974 in a gun store in downtown San Angelo, Texas. At the time I was stationed at Goodfellow Air Force Base attending a school and my buddy, Perry Fuller, showed me around. (By the way, Perry is a great fellow and has his own web site, The Churchwarden) Anyway, Perry took me to all the gun shops in town and at one they showed me this revolver. With money burning a hole in my pocket, I bought the gun and Perry and I went shooting. He let me clean the gun in his house and his wife, Amy, cooked a quail we shot using a Ithaca lever-action single shot 20 ga that Perry owned. Good times. I'm glad Perry and Amy are still together after all these years. But I digress...
These guns were made by Armi San Paulo or Uberti. Meant to be replicas or reproductions (a semantics subject for another time) of the Remington Army revolvers they are supposedly noticeably smaller than the originals. There is enough difference that Uberti went to great effort to make an original sized gun and to promote the difference. Still, I've never had a lick of trouble with the gun that wasn't my fault.
My favorite load with this gun is a Hornady .451" swaged round ball over 30 gr. ov Pyrodex P lit by a Remington #11 cap. this load is about as powerful as you can reasonably expect from this revolver and is accurate enough that I've repeatedly hit a military "E" type silhouette at 100 yards averaging a little better than 5 of 6 at that range.
The holster used for this gun is from Bianchi (back when John ran the business) and originally had a concho on the outside. I've removed that as I'm not one for shiny things. This holster has served me well for years. As you can see in this photo (click for a larger version), this gun could be a valuable and excellent part of my muzzleloading kit.
For a while, this was my home defense gun and was carefully loaded with wax melted around the nipples for over 2 years. When I finally fired it, every chamber fired perfectly. I think that a properly loaded cap and ball revolver can be a formidable defense tool, at least for the first 5 rounds. Why 5? Because the hammer must be carried on a bare nipple to an empty chamber. Safety first, the old fashioned way!
I wanted to use this revolver more but you can't carry it during muzzleloading season. Funny, huh? Oh, as a CHP holder I can carry my CHP gun, concealed, but not this (which I can't conceal). As though I'm going to smack a deer with it.
Saturday, May 19, 2007
Winchester 1876 Survey
Mr. Rick Bachman aka Buck Stinson (click on the name to send him an e-mail) is compiling a collectors' database of 1876 Winchesters. He is not at all interested in who owns the guns, only in their configuration. Don't worry if you send him a duplicate. You might include info missed by another reporter.
Serial number
Rifle, carbine or musket
Round barrel, octagon barrel, half octagon or heavy barrel over 1" across muzzle.
Caliber/chambering
Barrel length
Any special order features. ie, shotgun butt, half mag, set trigger, etc.
Any rework like outside refinish, new wood, etc.
This includes any stripped receivers or parts guns with serial numbers. These are also added to the list. If known, I might mention if it has been lettered.
Friday, May 18, 2007
RCBS Die Prices
Once upon a time one could afford to reform one case to another but now... Well, having been a machinist of sorts, I fail to see how RCBS justifies setting the MSRP of a form and trim die for $488.99! And WHY or HOW is it different from this form and trim die for $474.99? Makes me want to cuss.
Wednesday, May 16, 2007
New Grand-Daughter!
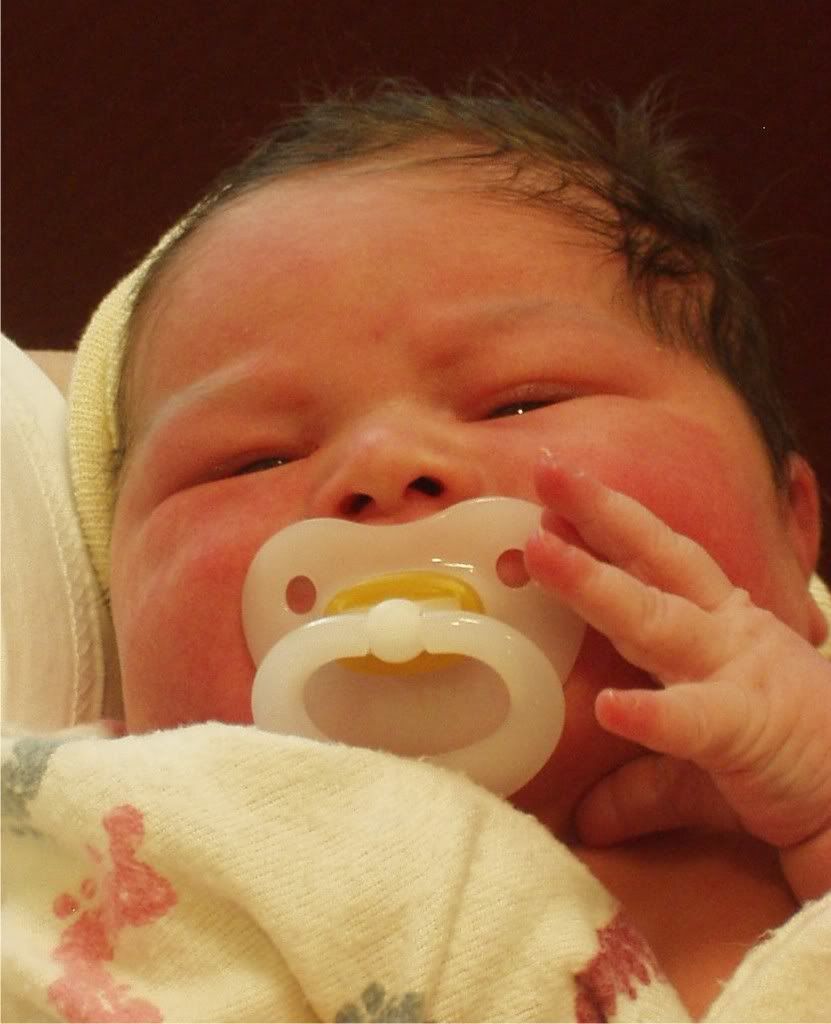 Born today at 10:03 AM was my Grand-Daughter Madeleine Grace Swisher. She weighed 8 lbs 2-1/2 oz and was 20" tall/long has blue eyes and black hair. Both mother and daughter are doing fine.
Tuesday, May 15, 2007
.45-75 Cases in Hand
Because I made them, I've got my first two .45-75 cases in hand. Well, they are just a hair short, because I started with just a hair too short .348 Winchester brass. But I'm excited. I'd like to drop a few of these empties in the sand myself. Did I say I'm excited.
Here's the steps I used.
1. .348 Winchester new brass
2. run brass into .348 sizing die just enough to ensure case mouth is round.
3. quick trim case to 2 inches (I now recommend 2.02 inches) with Dremel cutoff wheel.
4. put case in Lyman trimmer and square case mouth likely removing another .01"
5. chamfer case mouth
6. dip case mouth 3/10" into moly
7. run case into .375 expander (from .38-55 die set)
8. run case into .429 expander (from .444 Marlin or .44 Mag die set)
9. run case into .457 expander (from .45-70 die set)
10. lube and run case into .45-75 sizing die sans decapper rod/pin
11. trim to 1.88"
I tried the cases in my rifle and the rims of the .348 Winchester cases work (or seem to with empty brass) as is. This is a big time saver! The only thing these cases need is to be fireformed.
Mike Venturino used W231 and a round ball as his fireforming load. I have Bullseye. I need to research how much would be usable in this case.
Ruger Old Army Holster Enroute
Got notification to day tht Rob Leahy of Simply Rugged Holsters has shipped my 120 (Tom Threepersons modified) for the Ruger Old Army and a neat Swedish Mora knife. I don't know how long since I ordered but Rob has been collecting halibut. When you see a hundred pounds or so of halibut on the dock you know somebody has a good life. I think I can wait a bit while Rob feeds the kids! Rob makes a great product and I'm going to keep ordering from him to ensure that somebody lives a life I'd like to live.
Monday, May 14, 2007
.348 Winchester Brass and Dies Arrive
I got the dies because I could but what I really wanted was the .348 brass to become .45-75 Winchester brass. I'm so excited! Another step closer to fun times.
Another option for forming the .45-75 is to start with .50-90 Sharps brass. It is all a matter of cost and availability. If I found the brass, for less than the .348 or Jamison, that's what I'd do. I'm afraid that it is pretty expensive as Starline sells it for $1.16 per each or $286 per 250 cases. Jamison .45-75 is $1.25 per each or $124.99 per hundred (not including shipping) and the Bertram is $2.85 per each or $56.99 for a box of 20. .348 Winchester brass (when available) goes for $.59 per each or $29.49 per bag of 50. If the .348 Winchester is unavailable or you don't want to thin rims the .50-90 looks a lot better price wise.
Another option for forming the .45-75 is to start with .50-90 Sharps brass. It is all a matter of cost and availability. If I found the brass, for less than the .348 or Jamison, that's what I'd do. I'm afraid that it is pretty expensive as Starline sells it for $1.16 per each or $286 per 250 cases. Jamison .45-75 is $1.25 per each or $124.99 per hundred (not including shipping) and the Bertram is $2.85 per each or $56.99 for a box of 20. .348 Winchester brass (when available) goes for $.59 per each or $29.49 per bag of 50. If the .348 Winchester is unavailable or you don't want to thin rims the .50-90 looks a lot better price wise.
Steve Young has Video on Winchester 92
Steve Young AKA Nate Kiowa Jones, Internationally known as the Rossi 92 Specialist, shows you how to clean, modify and repair your Rossi 92.
DVD SELECTIONS: Introduction, Strip 2 Clean, Strip 4 Repair, Subassemblies, Action Mods, Reassembly and Additional Bonus Features. You can buy direct from Steve.
He also has a fix for the bolt safety that Rossi now includes on all 92s imported to the US.
DVD SELECTIONS: Introduction, Strip 2 Clean, Strip 4 Repair, Subassemblies, Action Mods, Reassembly and Additional Bonus Features. You can buy direct from Steve.
He also has a fix for the bolt safety that Rossi now includes on all 92s imported to the US.
Test Firing the 1876
I thought this was mildly interesting seeing that I can't fire mine (no ammo yet) and that I'm obsessing about the various 1876s. Uberti 1876 Sporting rifle caliber .45-60 being test fired by an Italian arms magazine...
Sunday, May 13, 2007
There's more than one way to shoot a gun...
A friend is buying a Ruger Montado. I hope that I'll get to shoot it as well as look at it when it comes in.
I like the chambering, .45 Colt, barrel length and hammer. Not so sure about the stainless steel. However, it is my friend dropping nearly 6 C-notes on it, not me. So I will get all the free pleasure out of it that I can. What was that about milking a cow without having to buy it?
I like the chambering, .45 Colt, barrel length and hammer. Not so sure about the stainless steel. However, it is my friend dropping nearly 6 C-notes on it, not me. So I will get all the free pleasure out of it that I can. What was that about milking a cow without having to buy it?
Saturday, May 12, 2007
Starline .38-55 LONG (2.125") Brass has Arrived
It hasn't been long since I ordered the new LONG (i.e. original length) .38-55 brass from Starline Brass of Sedalia, MO. At first inspection the brass looks good. It seems to be the correct length and while there are some dented case mouths, that is to be expected when brass is shipped in bulk (250 cases) through the UPS or mail. Starline brass has proven to be of high quality in the other cartridges I've loaded so I expect that it will be so here as well. Because Starline also produces the now standard shorter length this brass includes the 2.125 on the headstamp. Pretty nifty. Some have requested photos of the brass and I'll do that as soon as I'm able. Cost for the 250 cases was $112 shipped or a little less than $.45 per case. That's not unreasonable for what is still a hard to get case in this day of rising brass prices. I would recommend that you get it while it is available.
Wednesday, May 09, 2007
Brown Bear Kills Moose in Driveway
Not my driveway, thank goodness! My dog would have turned inside out with that going on. Watch all 3 parts of the video.
Cold Steel Proof Videos
I've been watching the Cold Steel Knives "proof" videos. I have to say that some of these videos is just plain cheesy, especially the music. Mr. Thompson and his crew of buff (except for Mr. Thompson, sorry, but I'm not buff either) demonstrators cut, slice, chop, stab and generally use every single product on rope, rolled grass mats, shipping tubes, plywood and cardboard cutouts, cable, hogs, chickens, beef ribs, meat filled leather jackets, boots and denim pants legs. They all look so serious. Come on guys, isn't it a hoot to do that for real while the company picks up the tab? I know it must be, it has to be. Otherwise product values are good, the facility is great, Lynn Thompson doesn't even doff his tie for some demos, and hogs, good golly, they cut hogs heads off! All in all it is fantastic. I wish I had about $10,000 to spend on his products.
Why? Because even the cheap stuff like the Canadian Belt Knife I reviewed earlier is a great product and it only costs you $10 or so. That defines inexpensive but it is a GOOD knife. How much better are all these other products.
If you can't buy a knife you can watch the videos. Now there's an evenings entertainment. The only thing better would be to have half-covered , leather and mail clad amazons doing the cutting.
What do I want? I'd like the 1917 Cutlass, the Warrior Katana, the Dragonfly Wakazashi, the Scottish Dirk, the Scottish Broad Sword, the Boar Spear, a couple of Finn Bears, and the San Mai Gurkha Kukri. They also have this neat Swiss Halbred in the catalog as a closeout for $50 and shipping but I haven't got the $50! Oh, drat.
No, it isn't as if I need any of it, particularly a halbred, but darn if I just find edged weapons fascinating.
Tuesday, May 08, 2007
John Taffin...
One of my favorite writers, without hesitation I pony up real money for his books. I must be on a video kick today because I found this:
Cowboy Action Shooting
The Japanese subtitles shouldn't bother you too much. Clearly, there is a desire among many Japanese for the freedom to participate in shooting sports despite the strictures on firearms ownership in Japan. They chose well, I think this video gives one a good idea of how a CAS match is run. Some interesting shooting techniques as well.
Wristbreaker

Another of "Uncle" Dave's treasures, this 1840 "Heavy" Cavalry Saber was apparently purchased by him from some surplus dealer perhaps Bannerman. For some reason I seem to remember some connection to Bannerman. This isn't outlandish as "Uncle" Dave lived upstate from New York City and Bannerman's Castle. I was shocked to discover this sword might be worth about $1200-1500!
I used to have many Walter Mitty type adventures when I was 12 or so. Just looking at that sword hanging on my bedroom wall would take me to places far away and exciting! I think that "Uncle" Dave felt the same way and that is how he was subtly portrayed by family members. I guess you had to be a bit of a spendthrift, not common in my family, to spend money on new guns and old swords! We might not be related but he seems very familiar to me for some reason.
Ames Mfg. Co.
The Ames Company started production of military contract swords in 1832 with the M1832 foot artillery sword, and ended with the M1906 cavalry saber in 1906. Ames produced more swords for the American military than any other company before or since, totalling over 200,000 swords in service by the end of the Civil War. In that time, at least ten different manufacturing marks were used on the swords. A little knowledge of the company history helps place a date range for when each stamp was used. When the company started producing swords it was led by Nathan P. Ames, and most marks reflected that fact. In 1847, Nathan died and left the company to his brother James. The markings on the blades were immediately changed from N.P. Ames to Ames Mfg. Co. In 1848, the town of Cabotville was incorporated into Chicopee, Massachusetts, and the marks were once again changed to reflect this. I have, however, seen blades dated as late as 1850 that still bear the Cabotville stamp, as the old dies were probably used until they were worn out.
The M1832 foot artillery swords, being Ames's first swords, were stamped with the eagle trademark already common on their other products. The attached picture shows most of the important details of the sword, except for the fact that the scabbard stud appears to have been removed and two carrying rings were attached. I have also observed several examples dated 1835 that do not bear an inspector’s initials on the blade. In most cases the marks will show some wear from being rubbed by the scabbard, and may be partially or mostly obliterated. Dates found on this sword range from 1832 to 1862, and I have included pictures of swords from every decade included in that span. The early models of this sword were marked as having been made in Springfield instead of Cabotville. The M1841 cutlass (dated 1842-1846) is the only other military issue Ames sword marked this way. The cutlass has been seen to list either the Springfield or Cabotville address, although these swords lack the eagle mark.
Ames’ second contract was for the M1833 dragoon saber. A rather clumsy weapon, it was quickly replaced. The marks on this saber appear to have actually been engraved into the blades, rather than stamped. In cursive script, they read N.P. Ames/Cutler/Springfield/year, and are dated from 1834 to 1839.
The 1840 models of cavalry, NCO, light artillery, and musician swords tend to have identical styles of marks for corresponding years. This trend continues when the 1860 models of cutlass and cavalry saber are introduced. The 1840 models’ were originally marked with N.P. Ames/Cabotville/date in the 1840s, followed by Ames Mfg. Co. /Cabotville/date around 1847, then by Ames Mfg. Co/Chicoppee/Mass in the 1850s. The latter mark was also used through the Civil war on some cavalry sabers. Sometime in the late 1850s (the earliest I have seen was 1859), Ames started using a new mark on all enlisted models that was carried through the Civil War. The words Made by/Ames Mfg. Co/Chicopee/Mass are enclosed within an unraveled scroll, and initials/US/date is stamped on the opposite side of the blade. This scroll mark is usually very weak, and often has been partially worn down by the scabbard—this is a feature that helps in authenticating the sword. I have also seen one other Ames mark, which I've seen repeatedly, but only on M1860 cavalry sabers dated 1864. The mark is shaped like an arc with the words Ames Mfg. Co/Chicopee,/Mass.
This is the sword that comes to mind when one imagines the illustrious cavalry charges of the Civil War. This sword was used in the US from 1840 through the Mexican War, the Civil War, and finally the Plains Indian Wars of the 1870's and 1880's. The sword was not loved by the Cavalry - officers and troopers alike - and earned the name "The Ole Wrist Breaker". The weight of the sword gave the impression that, when wielded strongly in a downward stroke, the momentum developed could not be slowed by the frail human wrist; therefore "breaking the wrist"! It replaced the US Model 1833 "Dragoon" Saber.
The "Light" Cavalry Saber of 1860 (aka New Model) was meant to replace the 1840 Heavy Cavalry, but this was not to come until long after the Civil War. The designations Heavy and Light do not necessarily refer to the weight of the sword; they do, in fact, refer to the "shock" impact delivered during a "charge". A Heavy Cavalry unit was more "heavily armed" whereas a Light Cavalry unit was "lightly" armed.
This sword, by far, is one of the most pleasing to own and display.
The specimen that I have is of brass hilt construction, with brown (almost black) leather-wrapped grip, and twisted brass retaining wire.
The Model 1840 is another derivation from French patterns - likely the Modele 1822 Cavelerie - and there are many variations (mainly imports), with some having iron hilts (forged steel) finished "in the black".
Friday, May 04, 2007
Barrel Stubbing
Click on the photo to see a larger version.
I was reading the other day about barrel stubbing and a member of some forum asked about it. I responded that barrel stubbing was a good option in some instances and another member posted that he thought it was so much "stuff". I think that is silly as many double barrel shotguns have been made on the monobloc system which attaches the barrels to a block in a similar manner. In fact, I think that many simply don't understand the process. So, I thought that I would republish this article that David wrote concerning the process. He says that he'll be updating the article and photos and republishing on his own website soon.
 This project was bankrolled by a Bellm forum member who planned for David White to stub the barrel with a match barrel and rechamber in 308 Bellm. A 21" Shilen Stainless Select Match Barrel in 30 caliber with a 6-groove, 1x10" twist was purchased. The new barrel was to be cut to 16" and a brake added. The scope mount base was to be modified to 5-screw. The forearm was too be bedded. He did the trigger work himself.
Rifle before the work and is an H&R Ultra 243 Winchester. These rifles currently sell for about $300. One of these with a 12 ga. shotgun barrel would be a great first gun for most young hunters. Being able to chamber for cartridges other than those offered by H&R can be a benefit for those owners who already have or have had guns chambered for cartridges for which they already have brass and bullets in quantity.
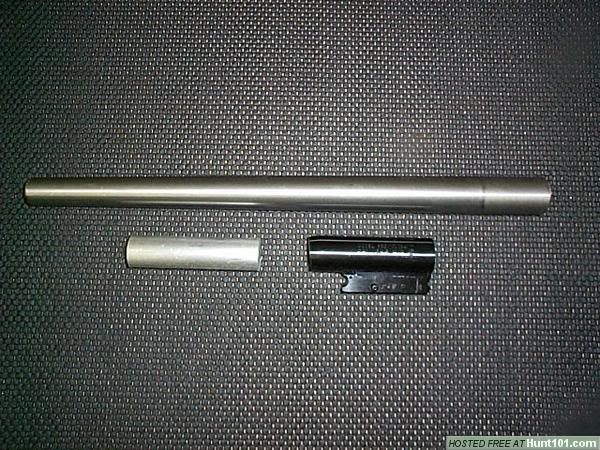 Shown next is the Match Grade Stainless Steel barrel that will be threaded and chambered, have an extractor slot cut cut into it and will eventually be screwed into the barrel stub, bottom right. This will become a better than new CUSTOM barrel for this particular H&R. The piece to the left of the barrel stub is what will eventually become the 4" "MAXIMIZER™" brake that will be machined and screwed onto the muzzle end of the barrel and will look like it is part of the barrel itself....
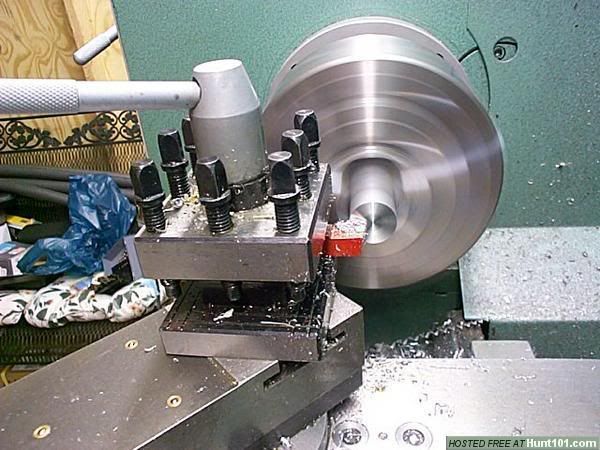 The 4" aluminum bar stock is faced off.
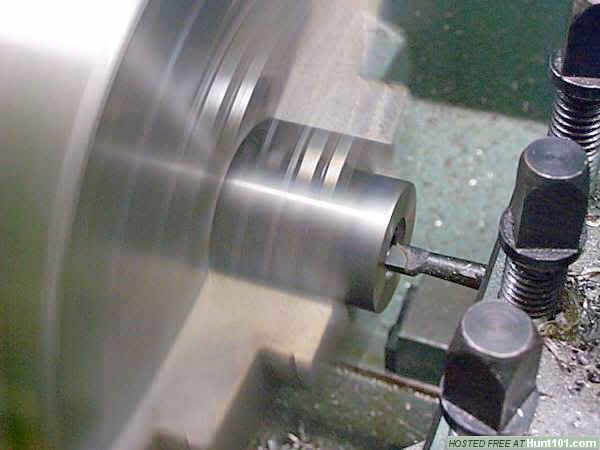
 After being faced and center drilled, David drills the EXPANSION CHAMBER in "steps" until it reaches it's final size, which in this case will be - 11/16".
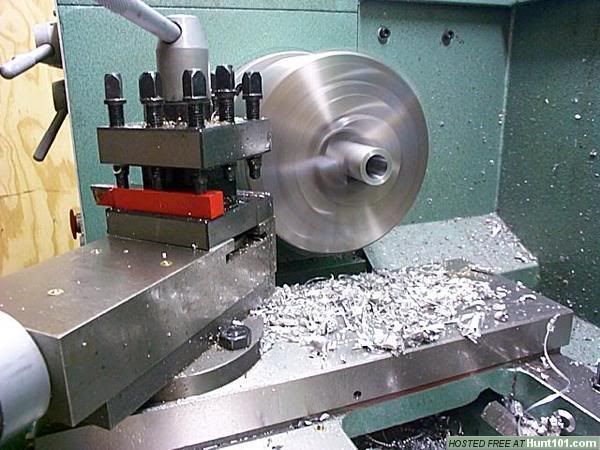 This piece of 1" diameter bar stock has been drilled to 11/16" and stops 3/8" short of the other end. It is now ready to be threaded.
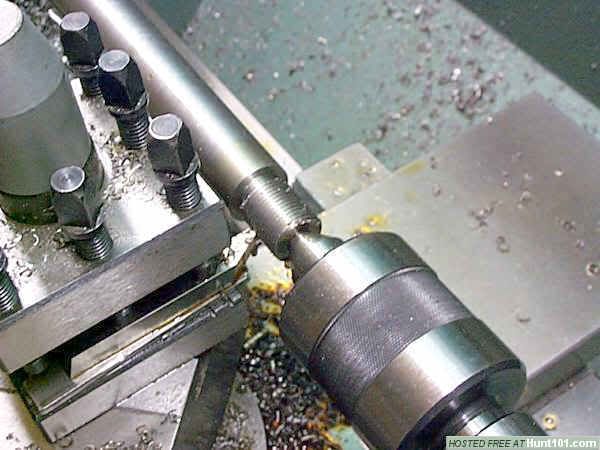
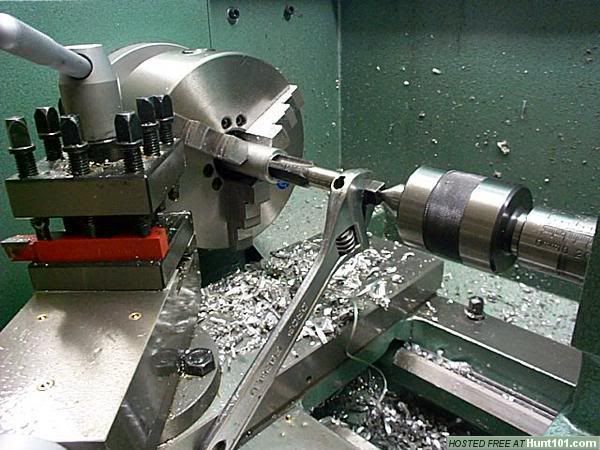 The brake is being threaded to 3/4-16. There will be a 3/4" length of the barrel that is threaded to accept this brake....
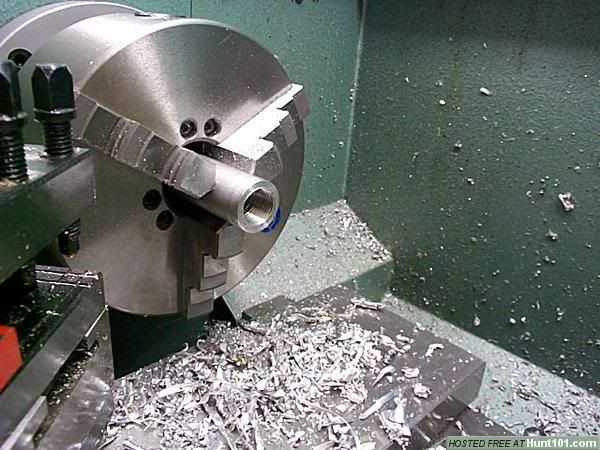 This is the brake after it has just been threaded and will receive a light clean-up pass to remove the burr from threading....
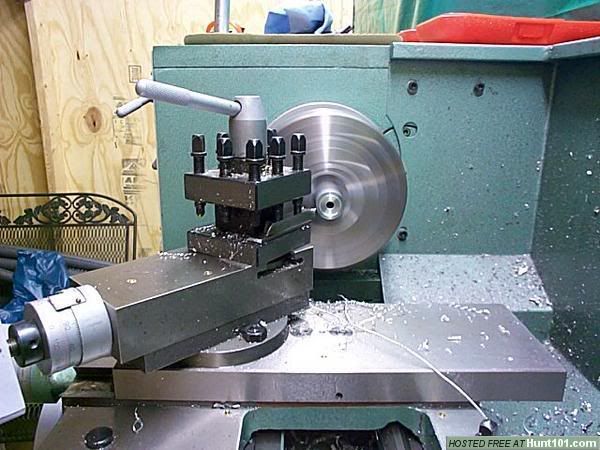 After the brake has been threaded and faced, it is removed from the lathe, swaped end and faced, center drilled, crowned and then open the exit pupil to .030 over bullet diameter, which in this case will be .338 since it is for a 308 and that will allow .015 per side bullet clearance....
 After most of the work has been finished in the lathe, it is set-up in a cross-slide and marked top dead center with the brake being set for a rearward angle of the porting and with the hole spacing set at a predetermined distance....
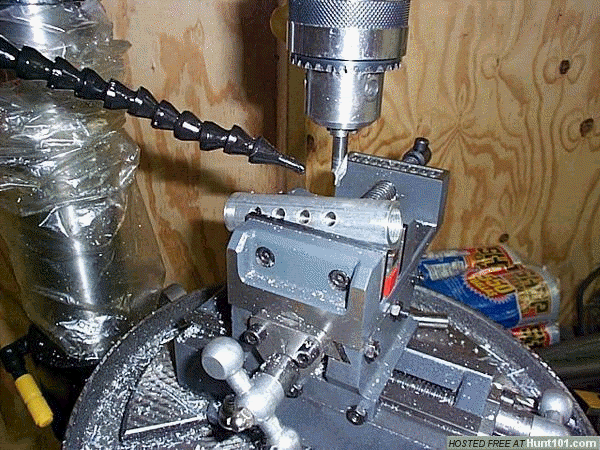 Porting the brake with 6 rows of 4 ports......
 Completed brake.
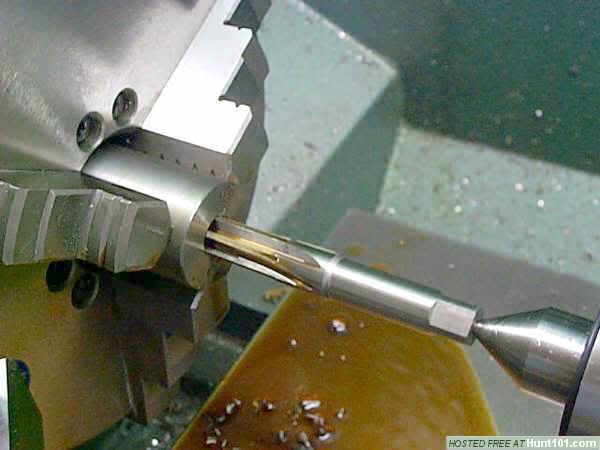
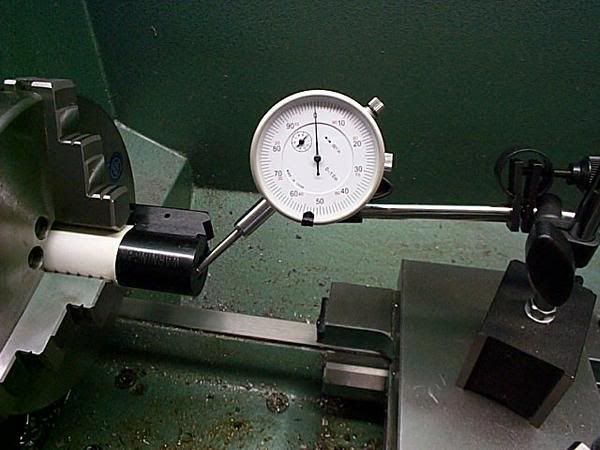 The chamber is being dialed-in to plus or minus .0003, but in this case, it mics in at .0001.....
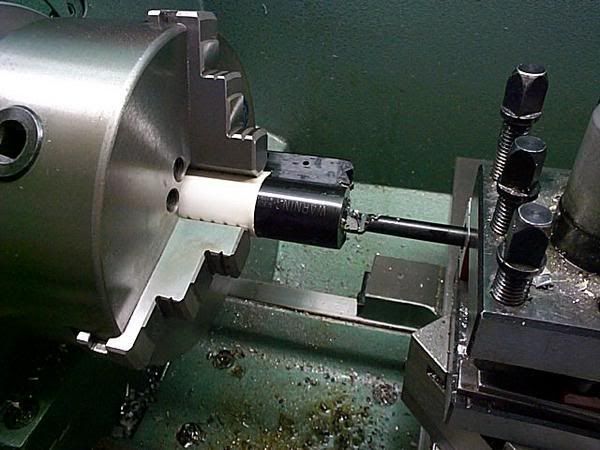 The chamber is being bored true, which in this case, did not take much to do.....
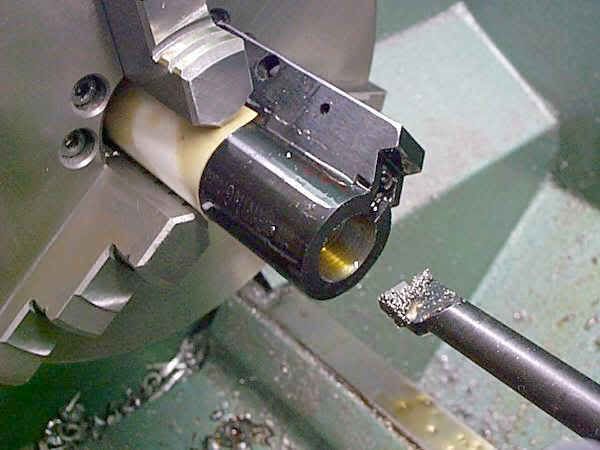 Here, the barrel stub has just been bored to it's final size......
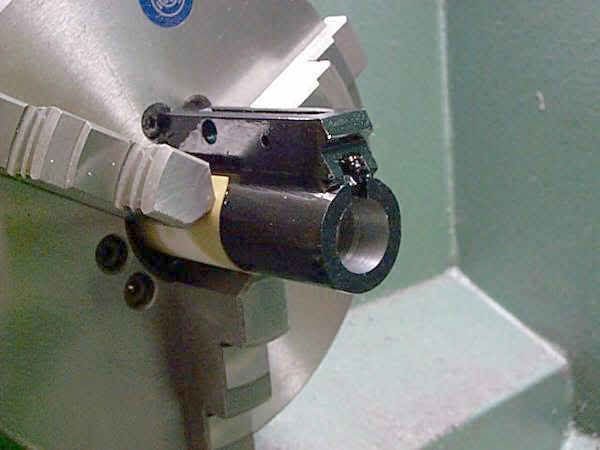 With the boring operation now complete, it is now ready to be internally threaded. What is not shown and we could not get a good picture of, is the three different shoulders or steps that were bored into the stub. These will easily be seen on the barrel itself before it is threaded. The 3/8" section that you see here, will serve as a front "guide" to help with any possible misalignment when the barrel is screwed into the stub...
 Here, the barrel stub is being internally threaded to the size of 13/16-16tpi.....
 This is the end in which the barrel is screwed into and has been faced at a perfect 90 degree angle to the bore and thread. The front 1/2" section that you see that is not threaded, acts as a guide and helps correct any misalignment between the barrel and stub when they are finally mated together.....
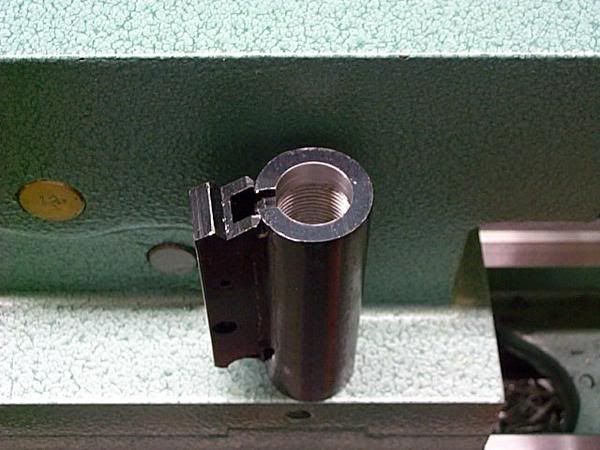 This is the chamber end that shows where the secondary internal shoulder is as well as the front barrel guide....
 Just getting started on the barrel itself....
 Here, the barrel was turned to EXACTLY match the internal dimensions that were bored into the barrel stub itself. The right end, towards the tail-stock, was turned to a diameter of .712 with the secondary shoulder for when the barrel and the stub are screwed together. The long straight shank section in the middle was turned to .8125 with a relief cut directly to the left of it. Then there is the barrel shoulder. The barrel was turned to 1.112 so as to match the diameter of the barrel stub and then tapers down....
 The barrel was threaded to 13/16-16tpi.....
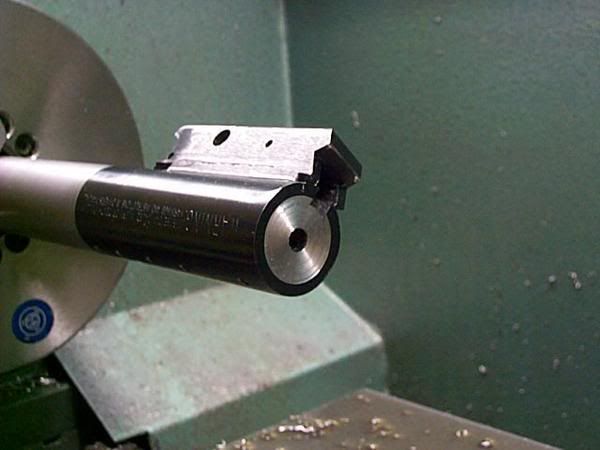 The barrel and stub are finally mated together to check for fit. Next will be the extractor slot being cut followed by light clean up passes on the barrel face, chambering and final polishing and finishing...
Now onto the trigger work.........
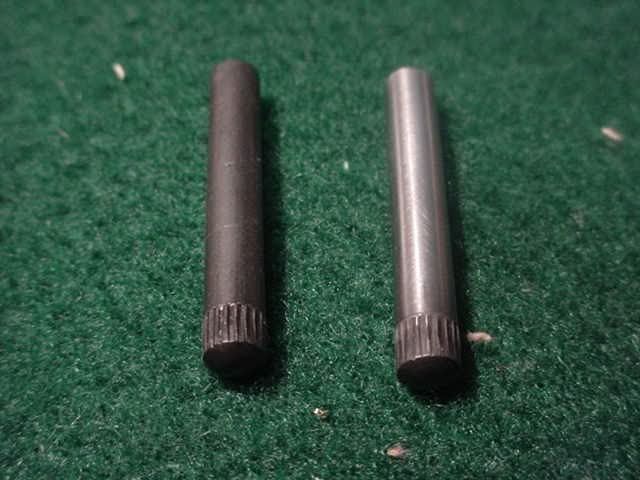 Stock trigger broke at 4 lbs 5 oz. for an average of 10 pulls. The trigger group is held in with pins that are splined on one end, so they have to be driven out from opposite side.
 Polished all of the retaining pins with 600 grit wet-or-dry sandpaper. Note rub marks on unpolished pin.
 On the trigger group I smoothed all of the through holes with 600 wrapped on a punch. Polished the trigger, hammer and lifter/transfer bar where they contacted. Stoned the trigger sear and hammer.
 Also sanded the barrel catch on both inner sides of the open slot.
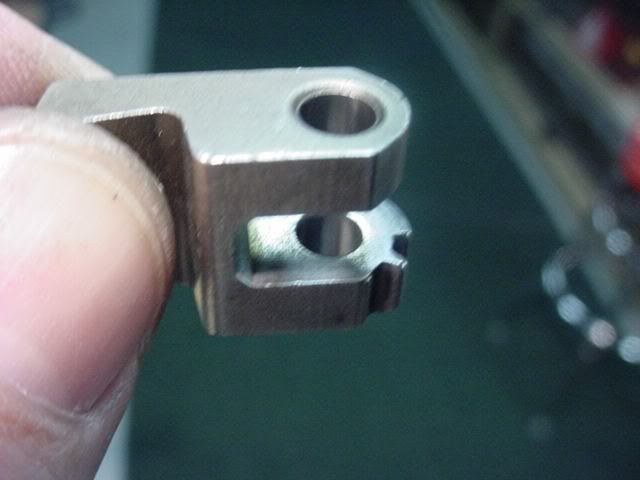
 All parts were lubed and then assembled. Trigger pull was then tested....not much better. Disassembled again and stoned the sear and hammer some more. Reassembled and tested again. Must have gotten a little "carried away" on the second stoning as the pull now measures 2 lbs 11 oz for a 10 pull average. A little lighter than I planned......
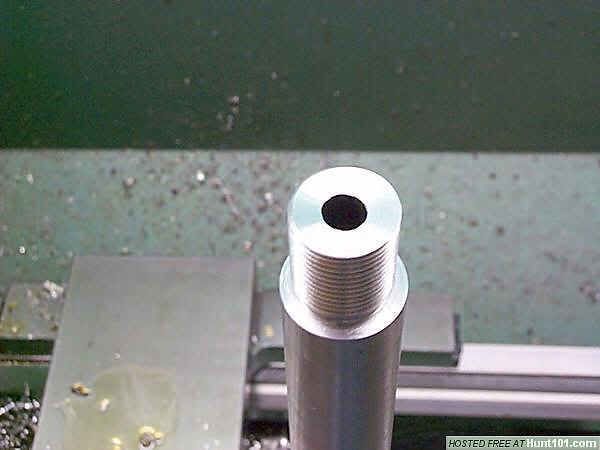 The rim counter bore is being cut here as well as the chamber being bored true to the bore...
 The chamber is being cut for the 308 Bellm...
 Barrel is being threaded to accept muzzle brake...
 The muzzle end has been cut to a precision 11 degree target crown...
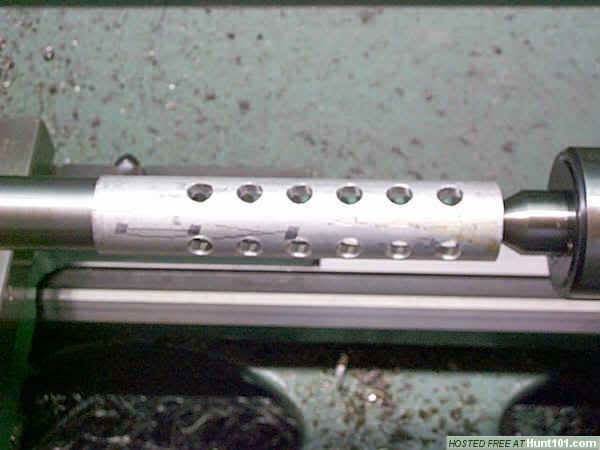 Muzzle brake bas been indexed and red loc-tited in place and is now ready to be turned down to match barrel diameter...
 The barrel and brake have been turned to contour and filed for a proper finished look and then they will be polished...
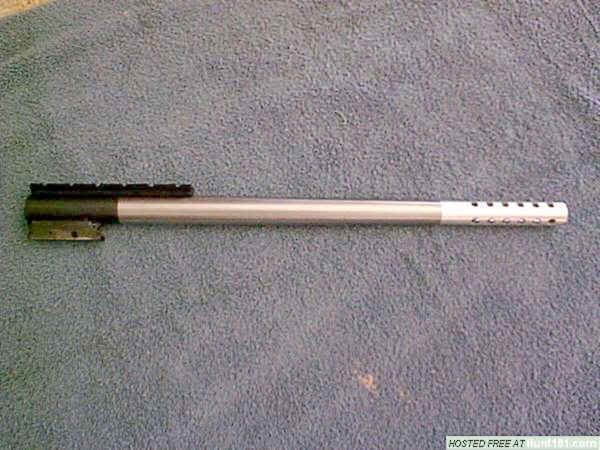 Barrel is now completed!
I was reading the other day about barrel stubbing and a member of some forum asked about it. I responded that barrel stubbing was a good option in some instances and another member posted that he thought it was so much "stuff". I think that is silly as many double barrel shotguns have been made on the monobloc system which attaches the barrels to a block in a similar manner. In fact, I think that many simply don't understand the process. So, I thought that I would republish this article that David wrote concerning the process. He says that he'll be updating the article and photos and republishing on his own website soon.
 This project was bankrolled by a Bellm forum member who planned for David White to stub the barrel with a match barrel and rechamber in 308 Bellm. A 21" Shilen Stainless Select Match Barrel in 30 caliber with a 6-groove, 1x10" twist was purchased. The new barrel was to be cut to 16" and a brake added. The scope mount base was to be modified to 5-screw. The forearm was too be bedded. He did the trigger work himself.
Rifle before the work and is an H&R Ultra 243 Winchester. These rifles currently sell for about $300. One of these with a 12 ga. shotgun barrel would be a great first gun for most young hunters. Being able to chamber for cartridges other than those offered by H&R can be a benefit for those owners who already have or have had guns chambered for cartridges for which they already have brass and bullets in quantity.
 Shown next is the Match Grade Stainless Steel barrel that will be threaded and chambered, have an extractor slot cut cut into it and will eventually be screwed into the barrel stub, bottom right. This will become a better than new CUSTOM barrel for this particular H&R. The piece to the left of the barrel stub is what will eventually become the 4" "MAXIMIZER™" brake that will be machined and screwed onto the muzzle end of the barrel and will look like it is part of the barrel itself....
 The 4" aluminum bar stock is faced off.
 After being faced and center drilled, David drills the EXPANSION CHAMBER in "steps" until it reaches it's final size, which in this case will be - 11/16".
 This piece of 1" diameter bar stock has been drilled to 11/16" and stops 3/8" short of the other end. It is now ready to be threaded.
 The brake is being threaded to 3/4-16. There will be a 3/4" length of the barrel that is threaded to accept this brake....
 This is the brake after it has just been threaded and will receive a light clean-up pass to remove the burr from threading....
 After the brake has been threaded and faced, it is removed from the lathe, swaped end and faced, center drilled, crowned and then open the exit pupil to .030 over bullet diameter, which in this case will be .338 since it is for a 308 and that will allow .015 per side bullet clearance....
 After most of the work has been finished in the lathe, it is set-up in a cross-slide and marked top dead center with the brake being set for a rearward angle of the porting and with the hole spacing set at a predetermined distance....
 Porting the brake with 6 rows of 4 ports......
 Completed brake.
 The chamber is being dialed-in to plus or minus .0003, but in this case, it mics in at .0001.....
 The chamber is being bored true, which in this case, did not take much to do.....
 Here, the barrel stub has just been bored to it's final size......
 With the boring operation now complete, it is now ready to be internally threaded. What is not shown and we could not get a good picture of, is the three different shoulders or steps that were bored into the stub. These will easily be seen on the barrel itself before it is threaded. The 3/8" section that you see here, will serve as a front "guide" to help with any possible misalignment when the barrel is screwed into the stub...
 Here, the barrel stub is being internally threaded to the size of 13/16-16tpi.....
 This is the end in which the barrel is screwed into and has been faced at a perfect 90 degree angle to the bore and thread. The front 1/2" section that you see that is not threaded, acts as a guide and helps correct any misalignment between the barrel and stub when they are finally mated together.....
 This is the chamber end that shows where the secondary internal shoulder is as well as the front barrel guide....
 Just getting started on the barrel itself....
 Here, the barrel was turned to EXACTLY match the internal dimensions that were bored into the barrel stub itself. The right end, towards the tail-stock, was turned to a diameter of .712 with the secondary shoulder for when the barrel and the stub are screwed together. The long straight shank section in the middle was turned to .8125 with a relief cut directly to the left of it. Then there is the barrel shoulder. The barrel was turned to 1.112 so as to match the diameter of the barrel stub and then tapers down....
 The barrel was threaded to 13/16-16tpi.....
 The barrel and stub are finally mated together to check for fit. Next will be the extractor slot being cut followed by light clean up passes on the barrel face, chambering and final polishing and finishing...
Now onto the trigger work.........
 Stock trigger broke at 4 lbs 5 oz. for an average of 10 pulls. The trigger group is held in with pins that are splined on one end, so they have to be driven out from opposite side.
 Polished all of the retaining pins with 600 grit wet-or-dry sandpaper. Note rub marks on unpolished pin.
 On the trigger group I smoothed all of the through holes with 600 wrapped on a punch. Polished the trigger, hammer and lifter/transfer bar where they contacted. Stoned the trigger sear and hammer.
 Also sanded the barrel catch on both inner sides of the open slot.
 All parts were lubed and then assembled. Trigger pull was then tested....not much better. Disassembled again and stoned the sear and hammer some more. Reassembled and tested again. Must have gotten a little "carried away" on the second stoning as the pull now measures 2 lbs 11 oz for a 10 pull average. A little lighter than I planned......
 The rim counter bore is being cut here as well as the chamber being bored true to the bore...
 The chamber is being cut for the 308 Bellm...
 Barrel is being threaded to accept muzzle brake...
 The muzzle end has been cut to a precision 11 degree target crown...
 Muzzle brake bas been indexed and red loc-tited in place and is now ready to be turned down to match barrel diameter...
 The barrel and brake have been turned to contour and filed for a proper finished look and then they will be polished...
 Barrel is now completed!
Thursday, May 03, 2007
Starline Brass has the LONG .38-55 (2.125") Brass
I was cruising the net looking for .45-75 Wichester brass and stopped in at Starline long enough to realize they had finally released and to order 250 of the .38-55 Long (2.125") cases. They also make the now standard, shorter length.
Subscribe to:
Comments (Atom)

