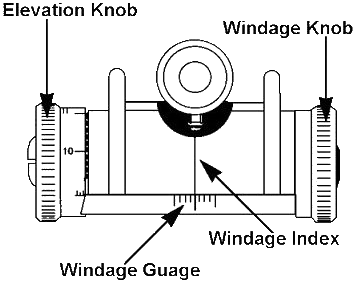
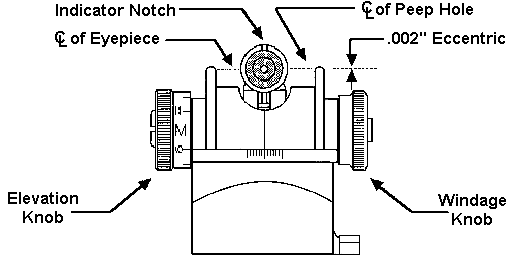
 How do you know your rifle has the correct rear sight particularly when you realize that neither drawing number nor the serial number was marked on the individual parts. Basically, there are four combinations of these parts to make the rear sight and they are distinguished primarily, but not completely, by the way the windage knob was manufactured and secured. In the early rear sight, the windage knob could be removed by screwing out the windage knob flush nut. Soldiers complained that the knob often came loose and allowed changes in windage, or else fell off altogether and it or its spring or lost.
To remedy this, the Ordnance Department replaced the flush nut with a lock bar that could be tightened down and held in position by a spring. The problem with this arrangement was that if a soldier had to make a windage adjustment quickly, he often could not do without a tool to loosen the lock bar.
To solve this problem, the Ordnance Department ordered the locking bar to be replaced with the original flush nut but one that was held captive on the windage knob shaft so that it could not fall off. This solved the problem but this fix was not applied until World War II had ended.
The fourth type of rear sight, by the way, was that developed for the National Match M1 Garands. It has the captive flush nut but windage adjustments are made in increments of 1/2 minute of angle. To accomplish this, the thread on the shaft is double that on the normal M1 windage knob shaft.
Each click of either elevation or windage changes the strike of the bullet approximately one inch on the target for every 100 yards of range, over its effective range.
Windage can be adjusted 16 clicks to the right or to the left of center index, and elevation can be adjusted from 0 to 72 clicks.
Sighting-In
1. Windage zero.
Center your rear sight according to the index marks on the receiver and sight base. Center the front sight in the dovetail. Under no-wind conditions, fire a group at 100 yards. If the group is not centered, loosen the front sight and move it opposite to the direction of the group error. Repeat as necessary.
2. Elevation
For simple "Battle-Zero," Zero-in at 25 yards, then come up 1 click. This effectively zeros-in for 200 yards. This should result in groups centered on a 4" diameter from 0 to 400 yards.
Standard Issue Rear Sight

National Match Rear Sight

Start zeroing by ensuring the windage index on the rear sight base is aligned with the center line of the witness marks on the base of the service rifle's receiver.


No comments:
Post a Comment